
Every fall, your furnace is about to work harder than it has all year — and the single easiest thing you can do for it takes about ten minutes and costs less than a pizza. A clogged filter chokes airflow, which makes the whole system work harder: higher energy bills, more wear on the blower, and dustier air in every room.
The good news: changing a furnace filter is genuinely one of the simplest home maintenance jobs there is. No tools, no strength, no expertise. If you can open a panel and slide a rectangle into a slot, you can do this.
Quick answer: Turn your thermostat to “off,” open the filter slot between the return duct and the furnace, and slide the old filter out. Buy the same nominal size printed on its frame, insert the new filter with the airflow arrow pointing toward the furnace, and turn the system back on. Check monthly; replace every 1–3 months.
⏱ 10 minutes · 💲 $2–15 per filter (typical price range — see the comparison below) · 🛠 Beginner
What you’ll need:
- A replacement filter in the right size and type (see “Choosing your filter” below)
- A flashlight or your phone light — filter slots are always in the dark
- Your phone camera or a marker — to record the size and arrow direction
That’s it. No tools required. (If your basic toolkit is still coming together, our essential DIY tools guide covers what every new homeowner should own.)
Safety first: Always switch the thermostat to “off” before opening the filter slot. And this guide covers the filter slot only — if you see exposed wiring, gas components, or anything that isn’t clearly the filter compartment, stop. That’s HVAC-pro territory.
Step 1: Turn the system OFF at the thermostat
Don’t just nudge the temperature — switch the thermostat’s mode to “off.” If the blower kicks on while the filter slot is open, it pulls dust straight into the blower and coils with no filter to catch it. Ten seconds of prevention.
Step 2: Find the filter slot
The filter sits between the return-air duct and the furnace (or air handler), catching dust before air reaches the blower. You’ll find it in one of three places:
- A slot in the return duct where it meets the furnace — look for a thin vertical or horizontal slot with a small cover or door, sometimes with a handle. This is the most common setup.
- Inside the blower compartment behind the furnace’s front access panel. The panel usually lifts or swings off without tools.
- In a return-air grille — a large vent in a wall or ceiling, common in apartments and condos. The grille swings or lifts open to reveal the filter behind it.
Still can’t find it? Check your furnace manual (most are online by model number) — or take it as a sign to have an HVAC tech show you during your next service visit.
Step 3: Pull out the old filter and read it
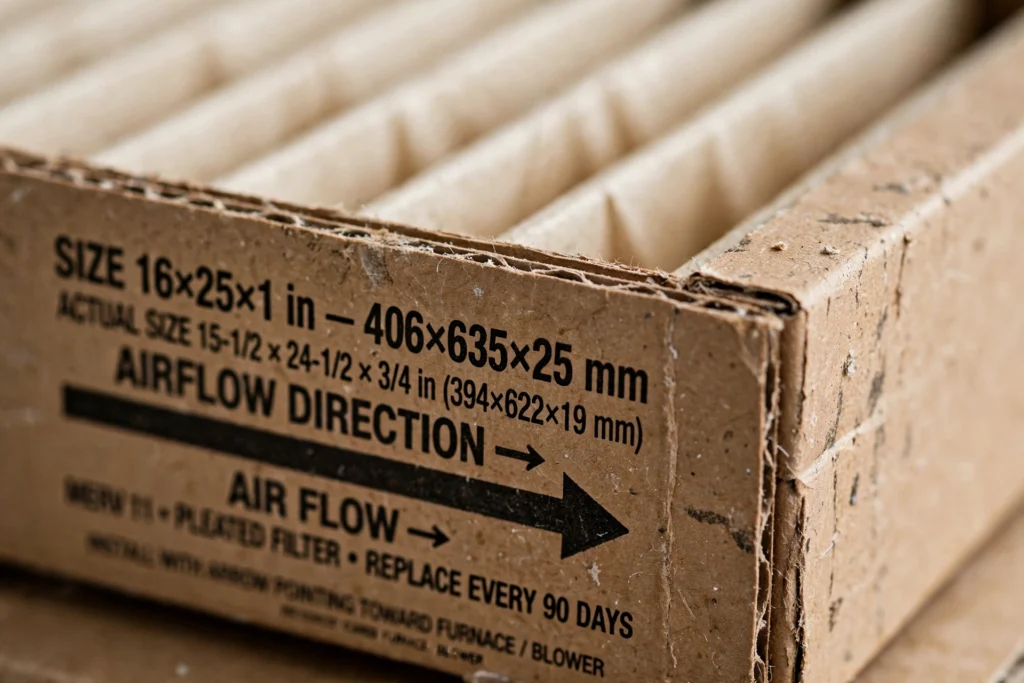
Slide the old filter out and look at the cardboard frame. Two things matter:
- The size, printed on the frame edge — something like 16x25x1. That’s the nominal size (the actual filter is a hair smaller, which is normal). Buy that exact nominal size.
- The airflow arrow direction. Note which way it points before you pull the filter out — then take a photo anyway. Future you will be grateful.
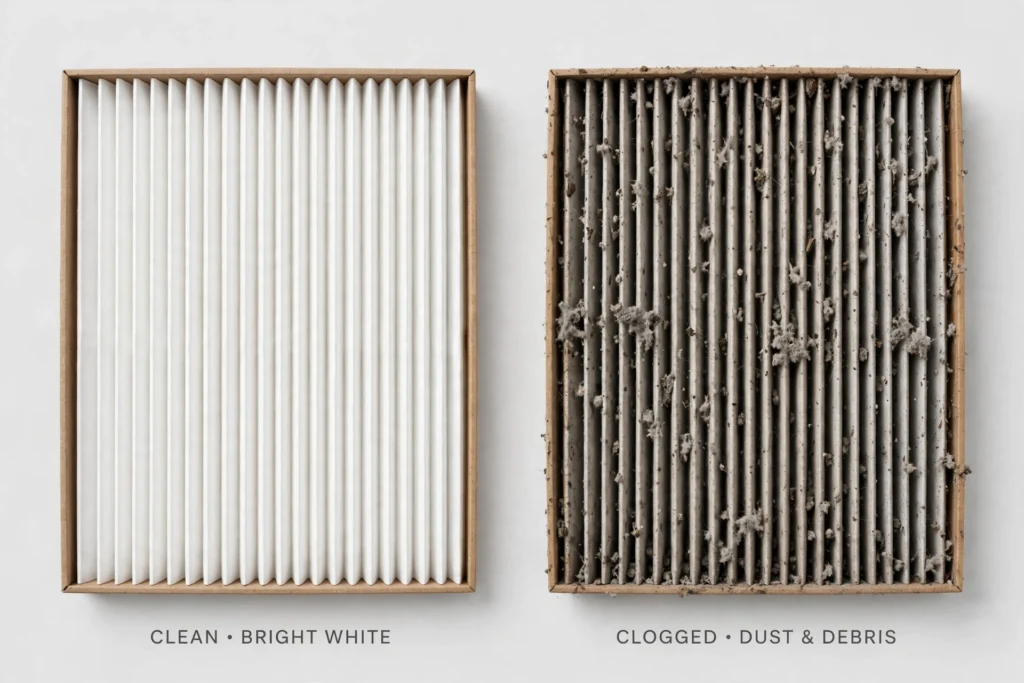
If the old filter is gray, matted, and caked with dust, that’s visual proof this job matters. If it looks brand new after months, you’re probably changing it too often — or you have very clean air.
Step 4: Choose your replacement filter
Filters are rated by MERV (Minimum Efficiency Reporting Value) — basically, how small the particles they catch. Higher MERV catches finer stuff, but also restricts airflow more. Here’s the honest breakdown:
| Filter type | Typical MERV (roughly) | Typical cost each* | Pros | Cons | Best for |
|---|---|---|---|---|---|
| Fiberglass flat-panel | 1–4 | $2–5 | Cheapest; lowest airflow restriction | Catches only large dust and lint; needs replacing most often | Tight budgets, or older systems that need minimal restriction |
| Pleated (polyester/cotton) | 5–13 | $8–15 | Good balance of filtration and airflow; the standard choice | Costs more; higher-MERV versions can strain older blowers | Most homes — MERV 8 is the safe default |
| High-efficiency / deep pleated (4–5″ thick) | 13–16 | $15–30+ | Best particle capture for allergies and pets | Most expensive; highest restriction; your system may need a pro’s OK | Allergy/pet households with compatible systems |
*Typical price ranges, not quotes — prices vary by brand and store. Read the MERV rating on the actual product label; these are typical groupings.
The rule of thumb: when in doubt, match what was there before. A MERV 8 pleated filter is a solid, safe default for most homes. Before jumping to a high-MERV filter on an older system, check your furnace manual or ask an HVAC tech — more filtration means more resistance, and some older blowers don’t handle it well. More filtration is not automatically better.
Also: match the thickness to your slot. If your slot takes a 1-inch filter, buy a 1-inch filter — don’t try to wedge a thicker one in.
Step 5: Slide the new filter in — arrow toward the furnace
This is the step everyone second-guesses, so here’s the simple version: the arrow points in the direction the air flows, which is toward the furnace/blower. Air comes from your rooms through the return duct and into the furnace — so the arrow points at the furnace.
See our quick-reference guide: which way should a furnace filter arrow point.
Slide the filter fully into the slot and close the cover, panel, or grille. It should fit snugly with no gaps around the edges — air sneaking around the filter is air that isn’t being filtered.
Step 6: Turn the system back on
Switch the thermostat back to heat (or cool) and listen for a minute. Normal startup sounds mean you’re done. If anything sounds wrong — grinding, loud rattling — switch it back off and investigate or call a pro.
Step 7: Set a reminder (this is the step everyone skips)
The filter change takes ten minutes. Remembering to do it is the actual hard part:
- Check monthly, replace every 1–3 months. During heavy heating or cooling season, or if you have pets or allergies, lean toward monthly.
- Write the size on the duct with a marker next to the slot. Next time, no measuring, no guessing.
- Keep one or two spares on hand. The easiest maintenance is the one you don’t have to shop for.
This is exactly the kind of recurring task our new homeowner maintenance checklist is built for — seasonal jobs, on a schedule, before they become problems.
Never run the system with the slot empty. With no filter, dust goes straight onto the blower and coils. If you’re mid-swap and need to leave it, slide the old filter back in temporarily rather than leaving the slot open.
While you’re at it: 5-minute fall add-ons
You’re already at the furnace, so make it count:
- Vacuum the return grille — dust on the grille is dust that never even reaches the filter.
- Make sure supply vents aren’t blocked by furniture, rugs, or curtains.
- Test your smoke and CO detectors before heating season starts — a chirping detector at 3 a.m. in January is avoidable. Here’s how to stop a smoke detector from chirping if yours is already complaining.
How often should I change my furnace filter?
Check it monthly and replace it every 1–3 months. Go monthly during heavy heating or cooling season, or if you have pets, allergies, or a dusty household. If it looks visibly dirty, it’s overdue — don’t wait for the calendar.
What size furnace filter do I need?
Read the size printed on your old filter’s cardboard frame — for example, 16x25x1. That’s the nominal size; buy that exact size. If the old filter is gone, measure the slot’s length, width, and depth. Pro tip: write the size on the duct with a marker so you never have to measure again.
Which way does the arrow point on a furnace filter?
Toward the furnace (the blower). The arrow shows the direction of airflow, and air flows from the return duct into the furnace — so the arrow points at the furnace, not away from it.
Do I need to turn off the furnace to change the filter?
Yes. Switch the thermostat mode to “off” before opening the filter slot, so the blower can’t kick on while the slot is open and pull unfiltered dust into the system.
Can I vacuum a furnace filter and reuse it?
Disposable filters are meant to be replaced — vacuuming doesn’t restore them and can damage the filter media. Washable/reusable filters do exist, but only use one if your system was designed for it: wash it, let it dry completely, then reinstall. A damp filter in a dark duct is a mold invitation.
What happens if I never change my furnace filter?
Restricted airflow makes the system work harder (higher bills, more wear on the blower), lets more dust circulate through your home, and in extreme cases can contribute to overheating and system shutdowns. It’s the cheapest preventive maintenance your HVAC system gets.
When to call an HVAC pro — no exceptions
Changing the filter is DIY. Everything past the filter slot is not. Call a licensed HVAC technician if:
- There’s no filter slot, or the slot/cover is damaged or missing.
- You see standing water, heavy rust, or smell something burning around the furnace.
- You smell gas — leave the house and call the gas company from outside first, not an HVAC tech.
- You want to upgrade to a high-MERV filter on an older system — a pro can tell you whether your blower can handle the extra resistance.
- Airflow is still weak with a clean new filter — that’s a duct or blower problem, not a filter problem.
- Anything involves wiring, the burner, the pilot light, or gas connections. Full stop.
The Bottom Line
Ten minutes, a few dollars, two to four times a year — and it’s the highest-ROI maintenance task in your entire house. Do it now, at the start of fall, before the first cold snap has your furnace running around the clock. Your blower, your energy bill, and your lungs will all notice the difference.