
Every fall, the same quiet disaster plays out in thousands of homes: the garden hose stays connected, the first hard freeze hits, and water trapped in the pipe expands until the pipe splits — inside the wall. You often don’t find out until spring, when the thaw turns a hidden crack into a flooded wall cavity.
The good news: winterizing an outdoor faucet (also called a hose bib or spigot) is one of the simplest fall maintenance jobs there is. About 15 minutes, almost no tools, and it prevents a repair that means opening up your wall. Do it before the first hard freeze.
Safety first: This job is about draining water, not cutting pipes. Never force a valve or faucet that won’t budge — forcing a frozen or corroded fitting can crack the pipe behind the wall. If anything resists, stop and read the “when to call a plumber” section.
Quick Answer
To winterize an outdoor faucet: disconnect the garden hose, shut off the water at the interior shut-off valve, open the outdoor faucet to drain the line, then leave the faucet open all winter. Add an insulated faucet cover for extra protection. The whole job takes about 15 minutes and costs under $10 — far less than a burst-pipe repair.
⏱ 15 min · 💲 $0–10 · 🛠 Beginner
What you’ll need:
- Insulated faucet cover ($3–10 at any hardware store) — foam slip-on cover; optional but cheap insurance
- Bucket and old towel — free; catches the water when you drain the line
- Flashlight or headlamp — for finding the shut-off valve in a dark basement or crawlspace
- Two adjustable wrenches (optional) — only if the hose is stuck on the faucet
Most of these overlap with the kit in our essential DIY tools guide.
Step 1: Disconnect the Garden Hose (The Step Everyone Skips)
Unscrew the garden hose from the outdoor faucet and drain it — then store it in the garage or shed for winter. Also remove any splitters, timers, or Y-connectors. This is the single most important step in this entire guide.
Why it matters: a connected hose traps water in the pipe. Even a “frost-free” faucet can’t protect a pipe that’s full of trapped water, because the water sits in the section of pipe exposed to the cold. Almost every frozen-hose-bib failure starts with a hose that was left attached.
If the hose is stuck: spray the connection with penetrating oil, wait 10 minutes, then use two wrenches — one on the hose fitting, one holding the faucet body steady. Always back up the faucet with the second wrench. Twisting the faucet body can crack the pipe inside the wall, which is exactly the disaster you’re trying to prevent. If it still won’t move, don’t force it — leave it for now and see the troubleshooting table below.
Step 2: Find and Close the Interior Shut-Off Valve
Somewhere inside your house — basement, crawlspace, utility room, or near the water heater — there’s a shut-off valve on the pipe that feeds the outdoor faucet. Follow the pipe from the exterior wall inward.
Turn the valve clockwise until it stops. That’s it — water to the outdoor faucet is now off.
Many of these valves have a small cap on the side (a bleeder or drain cap). You’ll use it in the next step. If your valve doesn’t have one, that’s fine — the draining just happens through the outdoor faucet.
Can’t find the valve? Some older homes never had one installed, or it’s hidden behind a finished wall. Don’t guess — see “when to call a plumber” below.
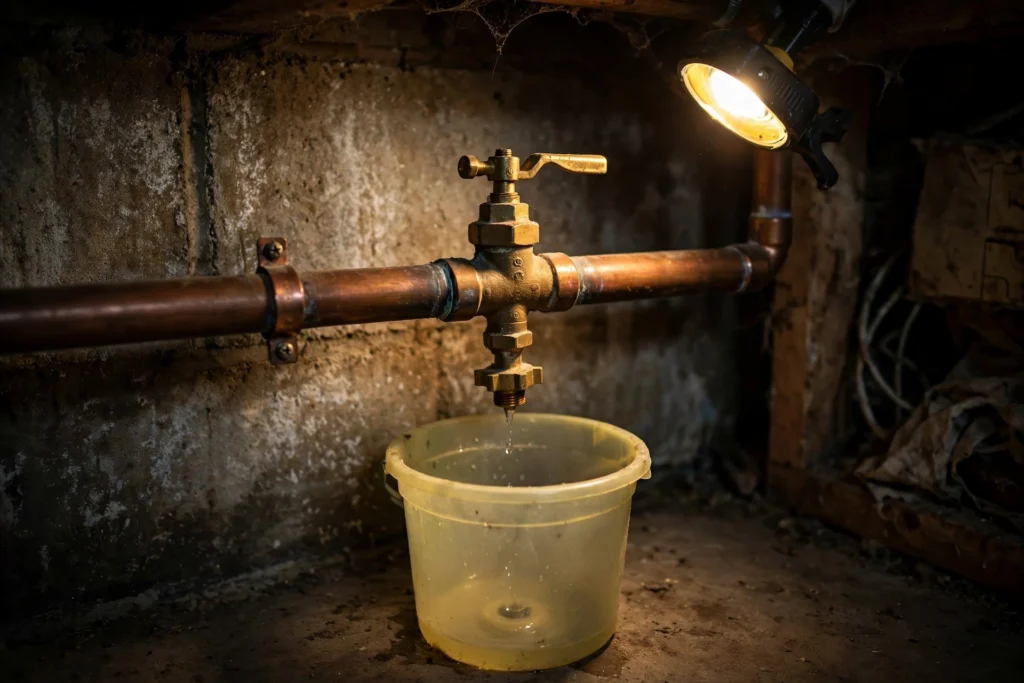
Step 3: Drain the Line
- Go outside and open the outdoor faucet fully (turn the handle counterclockwise).
- Go back inside. If your shut-off valve has a bleeder/drain cap, put the bucket under it and loosen the cap. Water will drain out of the pipe between the valve and the faucet.
- Let it drain until it stops — usually a cup or two of water, sometimes more on a long run.
- Tighten the bleeder cap back up so it doesn’t drip later.
- Leave the outdoor faucet open all winter. An open faucet lets any residual moisture escape instead of building pressure if it freezes.
In spring: reverse the order — close the outdoor faucet first, then reopen the interior valve slowly and check for leaks.
Step 4 (Optional): Add an Insulated Faucet Cover
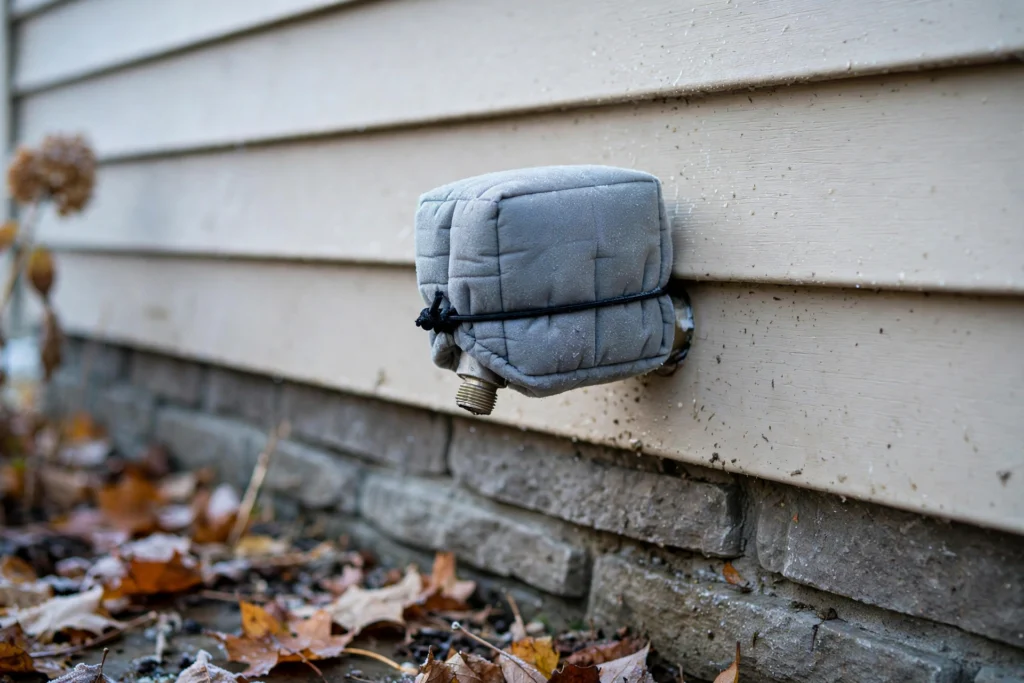
Slip a foam insulated cover over the outdoor faucet and tighten its drawstring or loop. It takes 30 seconds.
Be honest with yourself about what it does: a cover slows heat loss but cannot keep a water-filled pipe above freezing in a real cold snap. Draining the line (steps 1–3) is the actual protection; the cover is backup. If you can only do one thing, disconnect the hose and drain — never rely on a cover alone.
Frost-Free vs. Standard: What You Have and Why It Still Matters
- Standard sillcock: the valve seat is right at the faucet, in the cold zone. Draining is essential — there’s no other protection.
- Frost-free (freeze-proof) sillcock: the actual shut-off point sits several inches inside the heated part of your house, so the water stops where it’s warm. Sounds foolproof — but it’s not. You still must disconnect the hose. A connected hose traps water in the cold section of the pipe, defeating the entire design. Frost-free reduces risk; it doesn’t eliminate the need to winterize.
Not sure which you have? Frost-free faucets usually have a longer body and often a slight downward slope. When in doubt, winterize it the same way — the steps are identical either way.
Troubleshooting: Problem → Cause → Fix
| Problem | Likely cause | What to do |
|---|---|---|
| Can’t find an interior shut-off valve | Older home, or valve hidden behind finished wall | Call a plumber to install one; until then, disconnect the hose, drain what you can, and insulate |
| Hose is corroded onto the faucet | Mineral corrosion over years | Penetrating oil + two wrenches (one backing up the faucet body); never force it — if it won’t move, call a plumber |
| Water keeps dripping from the faucet after draining | Residual water still working out, or the interior valve isn’t sealing fully | Give it time to finish draining; if it never stops, the valve is leaking past its seal — call a plumber |
| Faucet handle won’t turn at all | Already frozen, or seized from corrosion | Do not force it — forcing a frozen fitting can split the pipe. Call a plumber |
| Wet wall, stain, or bulging drywall inside near the faucet | Possible burst or leaking pipe | Shut off your main water valve immediately and call a plumber — this is not a wait-and-see situation |
If you had to shut off your main water, our beginner plumbing repairs guide covers how your home’s shut-offs work and where your limits are.
Do I need to winterize my outdoor faucet?
Yes, if you live anywhere temperatures drop below freezing (32°F / 0°C) in winter. If you’re in a climate that never freezes, draining isn’t critical — but disconnecting the hose is still good practice, since a connected hose can cause backflow and pressure issues.
What happens if I don’t winterize my hose bib?
Water left in the pipe freezes and expands, which can split the pipe inside your wall. The cruel part: the leak often stays hidden until the spring thaw, when melting ice lets water flow through the crack — into your wall cavity. The repair means opening the wall and replacing the pipe: a plumber job, not a beginner DIY.
Can I just put an insulated cover on and skip draining?
No. A cover slows heat loss but can’t keep a water-filled pipe above freezing during a real cold snap. Draining the line is the protection; the cover is just backup. Skip the draining and you’re gambling.
Should I leave the outdoor faucet open or closed for winter?
Open. Leave it fully open all winter so any residual moisture can escape instead of getting trapped and building pressure. Close it again in spring before you reopen the interior valve.
When should I winterize — what month?
Before the first hard freeze. As a rule of thumb, aim for October in northern states and late fall in milder climates — but watch your local forecast, not the calendar. An early cold snap is exactly when unprepared pipes burst.
Does a frost-free faucet still need to be winterized?
Yes — at minimum, disconnect the hose. A connected hose traps water in the cold section of the pipe and defeats the frost-free design. The full drain steps above take 15 minutes and work for both types.
When to Call a Plumber — No Exceptions
This is a beginner job, but it has hard boundaries. Call a licensed plumber if:
- There’s no interior shut-off valve for the outdoor faucet. Adding one is a plumber job — it usually means cutting into the pipe.
- Water keeps flowing or dripping nonstop after you closed the interior valve. The valve is leaking past its seal and needs replacing.
- The faucet is frozen solid and won’t budge. Forcing it can split the pipe.
- You see water stains, bulging drywall, or hear water running inside the wall. Shut off your main water valve first, then call immediately.
- You suspect a pipe already burst. Main water off, plumber called, buckets out — in that order.
A good rule from our beginner plumbing repairs guide: if the job requires opening a wall or touching anything before your main shut-off, it requires a professional.
The Bottom Line
Winterizing an outdoor faucet is 15 minutes and under $10: disconnect the hose, close the interior valve, drain the line, leave the faucet open. It’s the cheapest insurance in home maintenance — a burst pipe inside a wall costs orders of magnitude more to fix than it does to prevent.
Make it part of your fall routine alongside the rest of the seasonal work in our new homeowner maintenance checklist — future you, warm and dry in January, says thanks.