
Short answer: you can’t tell whether a ceiling water stain is old or active by looking at it once. Color, size, and even whether it feels dry today don’t prove a leak has stopped. What answers the question is change: mark the stain, watch what it does, and match any change to what just happened — rain, upstairs plumbing use, air-conditioning runtime, or a cold snap. That pattern, not the stain’s appearance, tells you which system to investigate and who to call.
Before any of that, rule out the danger signs first.
First, Rule Out the Danger Signs
Stop here and get a professional involved promptly — before monitoring, touching, or testing anything — if any of these are present:
- The ceiling is sagging or bulging downward.
- The ceiling surface looks soft, swollen, or spongy instead of flat and firm.
- Water is actively dripping, or the stain is visibly growing over hours.
- The stain or water is at or near a light fixture or another electrical fitting.
Water and electrical fittings are a dangerous mix. If a stain reaches a light fixture, don’t touch or use that fixture and don’t do any “testing” around it. According to the CDC’s electrical-hazard guidance, electrical equipment that has gotten wet should not be turned back on until it has been inspected by a qualified electrician.
Never press hard on, puncture, or open up a wet ceiling to check it or drain it. A water-loaded ceiling can fail and come down. Keep people and pets from standing under a bulging ceiling, and let a professional handle it.
If none of those signs are present, you can safely work through the monitoring protocol below.
Step 1: Establish a Baseline
Your first job is to turn the stain into something measurable. This takes two minutes:
- Mark the boundary. If the stain is safely reachable from the floor or a stable step, trace a light pencil line just outside its edge. Don’t press on the surface — you’re drawing on it, not testing its strength.
- Date it. Write today’s date next to the line, and take two photos: one of the whole ceiling and one close-up.
- Note what’s above and nearby. Is there a bathroom, kitchen, or laundry room above? An attic? Is the stain near a light fixture or vent? (If it’s touching a fixture, go back to the danger signs above.)
That pencil line is now your instrument. A stain that never crosses it is telling you one thing; a stain that grows past it — and when it grows — tells you much more.

Step 2: What the Surface Can — and Can’t — Tell You
If the stain is safely reachable, the lightest touch gives you one useful signal:
- Damp, cool, or soft-feeling suggests moisture may be present now.
- Dry, firm, and unchanged suggests the surface is dry at this moment.
Treat that as one signal only. Dry does not prove there is no leak. Many leaks are intermittent — the surface can feel dry at noon and get wet again after tonight’s shower, the next rainstorm, or the next long AC cycle. That’s why the feel check never decides anything by itself; it gets combined with the timing log in the next step.
Two things not to rely on:
- Color. Ignore it as a dating tool. Guides disagree about what colors mean because a stain’s color depends on what the water passed through on its way down. A pale stain can be recent; a dark one can be years old.
- Rings. Concentric rings suggest the area has been wet more than once — residue gets deposited at the edge as water repeatedly soaks in and dries. That tells you about the stain’s history, not whether it’s wet right now.
Step 3: The Timing Test — Match Change to Events
This is the core of the diagnosis. Over the coming days, check the pencil line after relevant events and keep a simple log: date, what happened, and whether the stain changed. You’re collecting routing evidence — each result points the investigation toward a system; none of them is a final diagnosis on its own.
| What happened | If the stain changed… | Points toward | Your next step |
|---|---|---|---|
| Rain | It grew or darkened after rain | Roof / exterior water entry | Roofer — bring your dated log and photos |
| Upstairs plumbing use | It changed after showers, baths, toilet or laundry use above | Plumbing in the room above | Plumber — bring your dated log and photos |
| AC operation | It changed during or after long AC runtime | HVAC condensate drainage | HVAC technician |
| Cold snap / thaw, no rain | It appeared or worsened in cold weather without rain | Attic condensation (possible) | Roofer or home-performance professional to evaluate attic moisture |
| All of the above | No change through every relevant event | Potentially historic / inactive | Keep an occasional eye on it; cosmetic sealing becomes an option (below) |
If it changes after rain
A stain that reliably grows after rain points toward water entering from outside — the roof covering, flashing, or drainage around them. One storm can be a one-off event (an overflow, wind-driven rain); a repeat pattern across separate rains is much stronger evidence. This is a roofer’s investigation, and your dated log is exactly what helps them: it separates “it leaks when it rains” from guesswork.
If it changes after upstairs plumbing use
Changes that follow showers, baths, flushing, or laundry in the room above point toward that room’s plumbing — either pressurized supply lines or drains that only carry water during use. One optional observation can narrow it further: a stain that keeps growing while the home’s water is shut off makes a pressurized supply leak less likely, while a stain that only changes right after fixtures run points to use-related plumbing. If you need the shutoff itself, our guide to turning off your home’s water covers it — this article won’t reteach it.
Related evidence helps here: if drains above also gurgle or run slowly, that’s plumbing evidence too — see our guide to why a drain gurgles when the toilet flushes. Either way, the next step is a plumber, with your log showing exactly which activities trigger the change.
If it changes during or after AC operation
If there’s an air handler or ductwork in the attic above the stain, air-conditioning condensate is a real suspect: the system produces water that has to drain away, and drainage problems can overflow into the ceiling below. The EPA makes the same connection from the maintenance side, advising homeowners to keep air conditioning drip pans clean and drain lines unobstructed. A stain that tracks AC runtime — changing on hot afternoons while the system runs, stable when it’s off — points to an HVAC technician.
If it appears or worsens in cold weather, without rain
In cold climates, there’s a less-known possibility: moist indoor air that reaches a cold attic can condense — even freeze — on cold surfaces up there, then melt during a thaw and wet the ceiling below. It can look exactly like a roof leak, but it shows up with cold snaps and warm-ups rather than with rain. Treat this as a possibility to have evaluated, especially for top-floor ceilings in cold regions — a roofer or home-performance professional can assess attic moisture, insulation, and ventilation. It’s an evaluation referral, not a DIY repair.
If it doesn’t change at all
No growth through every relevant event is the “potentially historic” branch — with one discipline: the stain only earns that label after it has actually faced each event type that applies to it. A dry week with no rain proves nothing about rain. Once it has stayed inside your pencil line through rain, plumbing use, and AC or cold weather (whichever apply to its location), you can reasonably treat it as inactive, keep an occasional eye on it, and consider the cosmetic exit below.
The Stain Isn’t Necessarily Under the Leak
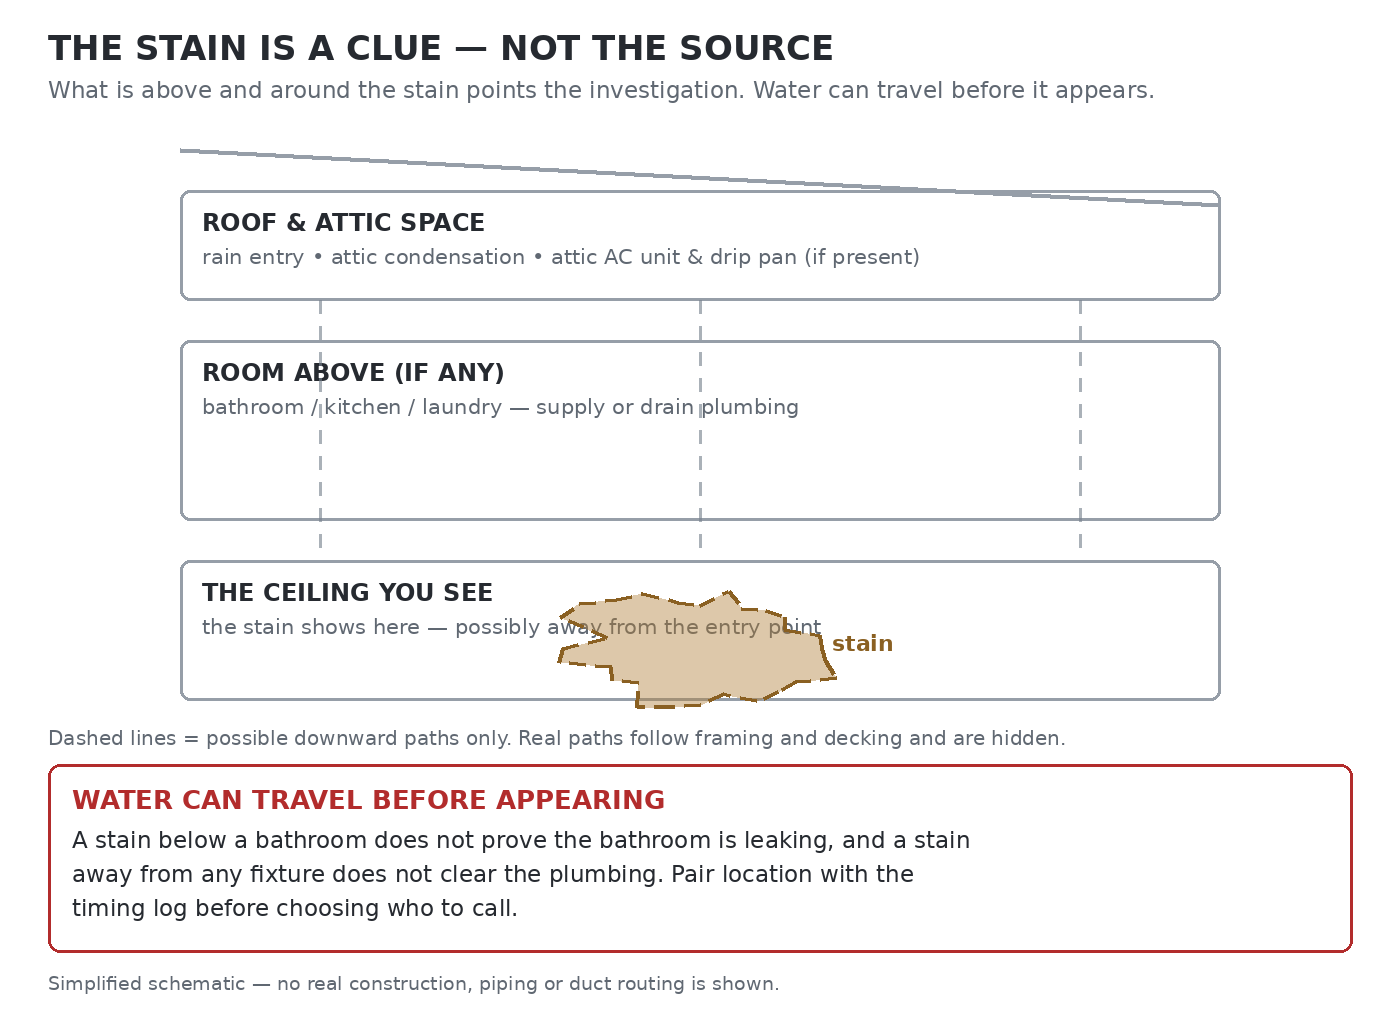
One correction that prevents bad conclusions: water can travel. It runs along framing and decking and can appear on the ceiling some distance from where it entered. So the stain’s location is a clue about what to investigate — never proof.
- A stain below a bathroom does not prove the bathroom is leaking.
- A stain away from any fixture does not clear the plumbing.
That’s why location is always paired with the timing log before choosing who to call.
What About Mold?
The U.S. Environmental Protection Agency’s position is straightforward: mold control is moisture control. As the EPA’s Brief Guide to Mold, Moisture and Your Home puts it, if there is mold growth in your home, you must clean up the mold and fix the water problem — cleaning without fixing the source means the problem will most likely come back.
- The clock, for a known wet event: the EPA advises drying water-damaged areas and items within 24–48 hours to prevent mold growth. For a mystery stain you found already dry, that clock is context — your first job is the monitoring protocol above.
- A musty smell is a clue, not a confirmation. The EPA notes you may suspect hidden mold if a building smells moldy but you can’t see a source. Let the smell justify closer investigation — through the timing test — not a conclusion.
- Scope limits: the EPA says a moldy area smaller than about 10 square feet (roughly a 3 ft. by 3 ft. patch) can in most cases be handled by the homeowner following its guidelines. Larger damage, or damage from sewage or contaminated water, is professional work.
- Never paint or caulk over moldy surfaces. The EPA is explicit: clean up the mold and dry the surfaces before painting — paint applied over moldy surfaces is likely to peel.
This article deliberately stops at those boundaries. It won’t walk through mold remediation — if your situation goes past them, that’s professional territory.
When Sealing and Painting Is Actually the Right Move
Painting is the last step of this protocol, never the diagnostic. The cosmetic exit is only appropriate when all three gates are met:
- The moisture source has been fixed, or your monitoring log supports that the stain is inactive through every relevant event.
- The area is genuinely dry — not just dry to today’s touch, but dry and staying that way.
- There’s no mold issue that needs cleaning up first (per the EPA boundary above).
Then, briefly: clean the surface, apply a stain-blocking primer made for water stains, then repaint. Primer choice genuinely matters — the wrong primer lets the stain bleed straight back through. Our guide to fixing peeling paint covers primer selection by cause, including stain-blocking options for fixed, fully dry water stains. It goes without saying: if the stain later grows past where you sealed it, the source wasn’t actually done — go back to the timing test.
Who to Call, Based on the Evidence
The point of the log is not to prove a trade is “at fault” — it’s to start the right professional’s investigation in the right place:
- Rain-linked changes → a roofer.
- Plumbing-use-linked changes → a plumber.
- AC-runtime-linked changes → an HVAC technician.
- Cold-weather pattern without rain → a roofer or home-performance professional to evaluate attic moisture.
- Any danger sign from the first section → a professional promptly — and a qualified electrician before a water-touched fixture is used again.
Bring the dated pencil log and the photos. “It grew past this line on these two dates, both after showers upstairs” shortens a service visit more than any description of the stain’s color.
FAQs
Can I just paint over a ceiling water stain?
Only after the three gates above: the source is fixed or monitoring supports that it’s inactive, the area is fully dry, and there’s no mold to clean up first. Use a stain-blocking primer intended for water stains — regular paint or the wrong primer typically lets the stain bleed back through.
How long should I monitor a stain before deciding it’s old?
There’s no universal number of days. Monitor until the stain has faced each event type that applies to it — rain, upstairs plumbing use, AC runtime, cold weather — at least once. Unchanged through all of them means potentially historic; unchanged during a quiet week when none of those events happened means you haven’t tested it yet.
Do I need a moisture meter for this?
No. The old-versus-active question is answered by documented change and timing, which is what this protocol gives you. A professional may use a meter as one input compared against known-dry material, but no single reading replaces watching what the stain actually does.
Is a ceiling water stain an emergency?
Only with the danger signs: sagging or bulging, soft or swollen drywall, active dripping, rapid growth, or water at a light fixture or electrical fitting. A stable stain with none of those is a monitor-and-route problem — but “not an emergency” doesn’t mean ignore it; run the timing test.
If the leak stopped, will the stain fade on its own?
Usually not — the visible mark is residue left behind by the water, and it typically stays until it’s sealed and repainted. That’s worth knowing in both directions: a stain remaining doesn’t prove the leak is active, and a stain looking lighter doesn’t prove it stopped. Trust the pencil line, not the shade.
The Protocol, in One Breath
Rule out danger signs → mark and date the edge → note what’s above → check the surface without trusting it alone → log what the stain does against rain, plumbing use, AC runtime, and cold snaps → let that pattern choose the professional (or earn the “potentially historic” label) → and only then, seal and paint. Folding a quick ceiling scan into your regular seasonal routine — the kind of walk-through in our new homeowner maintenance guide — catches the next stain while it’s still a pencil-line question instead of a ceiling repair.

Mohammed Algaari is the founder and editor of DIYMendly, a practical home-repair resource focused on making common DIY problems easier to understand and solve. He oversees the site’s content strategy and editorial direction, with an emphasis on clear, well-researched, step-by-step guidance based on reliable sources.