
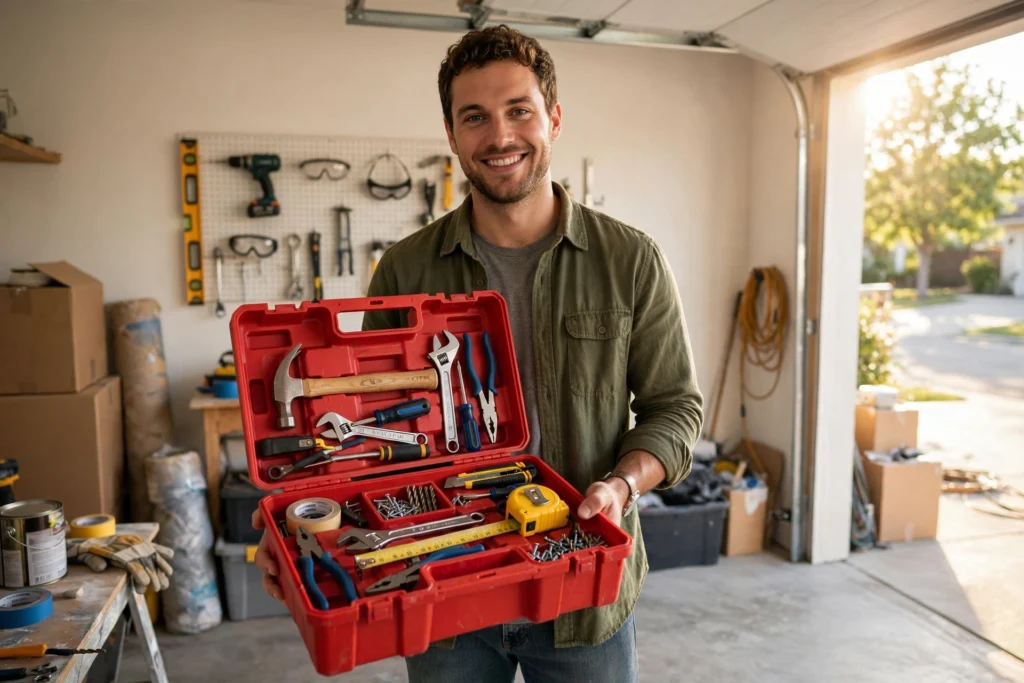
Every new homeowner has the same rite of passage. Something breaks on a Saturday evening — a towel bar rips out of the wall, a picture needs hanging, a toilet starts running — and you drive to the hardware store and freeze in the tool aisle. Two hundred hammers. Screwdriver sets from $8 to $80. Drill kits with more numbers on the box than a tax form. You grab the cheapest thing that looks right, get home, strip the screw head, and end up buying the better version anyway — plus paying a handyman $150 for a job that would have taken you twenty minutes with the right tool in the first place.
Here’s the good news: you don’t need a workshop. You don’t need a wall of pegboard or a rolling tool chest. You need about twenty tools — bought once, bought sensibly — and they’ll handle the overwhelming majority of what homeownership throws at you for years.
This guide covers exactly which tools those are, what each one actually does, what to look for when you buy it, what to skip, and how to keep it all working. No brand names, no sponsored picks — just honest guidance from the “buy it for the job in front of you” school of tool ownership.
A note on scope: This is a buying guide, not a project guide — it won’t teach you to rewire a circuit or frame a wall. It will make sure that when a beginner-friendly job comes up (and our new homeowner maintenance guide is full of them), you already own what you need.
Buy Once, Cry Once: How Smart Homeowners Buy Tools
Before the list, the philosophy — because how you buy tools matters more than which ones.
Trap #1: The giant kit. You’ve seen them: the 200-piece tool set in a blow-molded case for a suspiciously low price. Here’s the problem — most of those 200 pieces are filler you’ll never touch, and the dozen pieces you will touch are often the cheapest the manufacturer could make. A stripped screwdriver or a wrench that flexes under load doesn’t just waste your money; it damages the thing you’re working on. Buy the individual tools on the list below instead. You’ll spend about the same and end up with tools that actually work.
Trap #2: Buying for imaginary projects. Don’t buy a tile saw because you “might redo the bathroom someday.” Buy tools for the project in front of you, or the one definitely coming next month. Tools bought for fantasy projects gather dust; tools bought for real jobs pay for themselves immediately.
The “buy once, cry once” rule. For tools you’ll use constantly — your drill, your tape measure, your hammer — spending a bit more hurts exactly once. Buying the cheap version, hating it, and buying the good one later hurts twice and costs more. For tools you’ll use twice a year, the budget option is perfectly fine. Match the spending to the usage.
Borrow or rent before you buy. Need a pressure washer for one Saturday? A floor sander for one room? Rent it. Rental shops exist precisely so you don’t own a $400 tool you use once. A good rule of thumb: if you’ll use it fewer than three times, rent.
What actually matters in a tool: comfort in your hand (hold it in the store before buying), solid construction where it counts (metal parts for anything that takes force), and moving parts that operate smoothly. Everything else is marketing.
The Essential Hand Tools (Start Here)
Hand tools do most of the actual work in a home. Power tools get the glory, but the ten tools below are the ones you’ll reach for week after week. Each entry covers what the tool does, the version to buy, and what to look for.
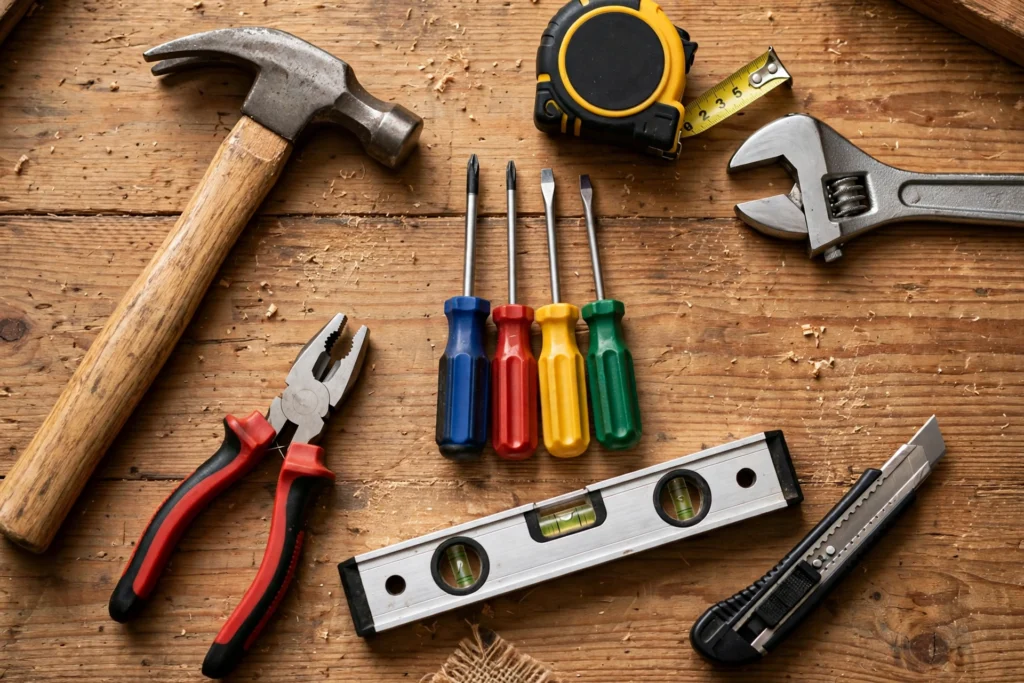
1. Claw Hammer (16 oz)
What it does: Drives nails, pulls nails, taps things into alignment, and handles light demolition (prying off a stuck piece of trim, for example). It’s the most iconic hand tool for a reason.
What to buy: A 16-ounce claw hammer is the sweet spot — heavy enough to drive nails efficiently, light enough to swing comfortably. Look for a comfortable, non-slip grip (hold several in the store), and a smooth face if you’ll do any finish work where a textured face would dent the surface. Fiberglass handles absorb vibration well; steel handles are nearly indestructible. Either works.
💲 $15–30 · 🛠 Beginner
2. Tape Measure (16 or 25 ft)
What it does: Everything starts with measuring — furniture placement, hanging pictures evenly, cutting materials, checking clearances. You’ll use this more than any other tool on this list.
What to buy: A 16-foot tape covers nearly all indoor jobs; go 25-foot if you have a big house or yard projects. Look for a wide blade (it extends farther without collapsing — that’s called “standout”), clear easy-to-read markings, and a belt clip plus a lock that actually holds. Learn to read the small fractional marks; misreading sixteenths of an inch is the classic beginner measuring mistake.
💲 $10–20 · 🛠 Beginner
3. Screwdriver Set
What it does: Tightening and loosening screws — outlet covers, cabinet hardware, door hinges, battery compartments, furniture. Screws are everywhere in a house, so this set earns its keep constantly.
What to buy: A set with the common types and sizes: flathead and Phillips in at least two or three sizes each. Magnetic tips are a genuine lifesaver (dropped screws in dark crevices are a rite of passage). Look for comfortable handles and hardened tips that won’t deform. A multi-bit screwdriver with interchangeable bits is a good compact alternative if drawer space is tight.
Beginner tip that saves hardware: Match the driver size to the screw head. A Phillips #2 in a #1 screw — or vice versa — is how screw heads get stripped. If the driver wobbles in the head, it’s the wrong size.
💲 $15–25 · 🛠 Beginner
4. Adjustable Wrench (10-inch)
What it does: Tightens and loosens nuts and bolts of different sizes with one tool — plumbing connections under sinks, furniture bolts, outdoor hose bibs, and dozens of small jobs. It’s also a core piece of the toolkit in our DIY plumbing repairs guide, which is reason enough to own one.
What to buy: A 10-inch adjustable wrench covers most homeowner needs. Look for smooth jaw adjustment and jaws that don’t wobble when locked — a wobbly jaw rounds off bolt heads. Keep the threads clean and it’ll last decades.
💲 $15–25 · 🛠 Beginner
5. Level (2-foot)
What it does: Tells you what’s actually straight — hanging shelves, pictures, curtain rods, towel bars, and anything else that looks “close enough” until you step back and see it isn’t.
What to buy: A 2-foot level handles most jobs; add a small torpedo level (about 9 inches) later for tight spots like leveling a single picture frame. Look for vials that are easy to read from your working angle. Your phone has a level app, but a real level is faster, more accurate, and doesn’t slide off the shelf.
💲 $10–20 · 🛠 Beginner
6. Utility Knife
What it does: Opens boxes, trims wallpaper and caulk lines, scores drywall, cuts cord and packaging, shaves down a sticking door edge. The humble utility knife is secretly one of the most-used tools in any home.
What to buy: A retractable-blade knife with a comfortable grip and easy blade changes. Keep spare blades on hand — and here’s the counterintuitive safety truth: a dull blade is more dangerous than a sharp one, because you push harder and it slips. Swap the blade the moment it starts dragging. Always cut away from your body, and retract the blade when you set it down.
💲 $8–15 · 🛠 Beginner
7. Pliers Set
What it does: Gripping, bending, twisting, and pulling where fingers can’t — pulling nails, bending wire, holding small parts, gripping rounded nuts.
What to buy: Start with two: slip-joint (combination) pliers for general gripping, and needle-nose pliers for reaching into tight spots and holding small parts. Add tongue-and-groove (channel-lock) pliers when you can — their adjustable jaws grip large pipes and fittings, and they’re the tool our plumbing guide reaches for under every sink. A basic three-piece set is inexpensive and covers nearly everything.
Safety note: Pliers are not a substitute for the right wrench on finished plumbing fixtures — their teeth can chew up chrome and soft metals. And never use pliers as a hammer. (Everyone does it once. Learn from everyone else’s mistake.)
💲 $20–35 for a set · 🛠 Beginner
8. Stud Finder
What it does: Locates the wooden studs behind your drywall so heavy things — shelves, mirrors, TVs, curtain rods — anchor into solid wood instead of crumbly drywall. Hanging a 40-pound shelf on drywall alone is how walls get holes.
What to buy: An electronic sensor-type stud finder — slide it along the wall and it beeps or lights up over a stud. Test it on a known stud first (measure 16 inches from a corner — that’s usually where the first one is) so you trust what it’s telling you. The old magnetic types work too, but electronic is far easier for beginners to read.
💲 $20–40 · 🛠 Beginner
9. Hex Key Set (Allen Wrenches)
What it does: Assembles flat-pack furniture, adjusts modern door handles and faucets, tightens bicycle parts — and unjams garbage disposals (the hex socket on the bottom of a disposal is exactly what our DIY plumbing repairs guide uses to free a stuck flywheel). If you own anything assembled in the last twenty years, you need these.
What to buy: A folding set (like a pocketknife) keeps all the sizes together so they don’t scatter through your toolbox. Get a set with both metric and SAE sizes — furniture tends to be metric, American-made fixtures tend to be SAE, and owning both ends the guessing.
💲 $8–15 · 🛠 Beginner
10. Putty Knife (1.5-inch, Flexible)
What it does: Applies and smooths spackle and patching compound (the drywall-patching tool), scrapes off old paint and caulk, pries things gently without gouging, and spreads wood filler. Small, cheap, and constantly useful.
What to buy: A 1.5-inch flexible blade for spreading compound, and if you want a second one, a stiff 2-inch for scraping. Flexible spreads; stiff scrapes. Keep the edge clean — dried compound on the blade leaves ridges in your next patch.
💲 $8–12 · 🛠 Beginner
The Essential Power Tools
The One to Buy First: Cordless Drill/Driver
If you buy exactly one power tool, make it this one. A cordless drill/driver drills holes and drives screws — assembling furniture, hanging curtain rods, mounting shelves, pre-drilling for wall anchors, driving the dozens of screws every home project involves. It turns hour-long hand-driving sessions into minutes, and it’s the tool that most separates “I guess I’ll call someone” from “I’ll just do it.”
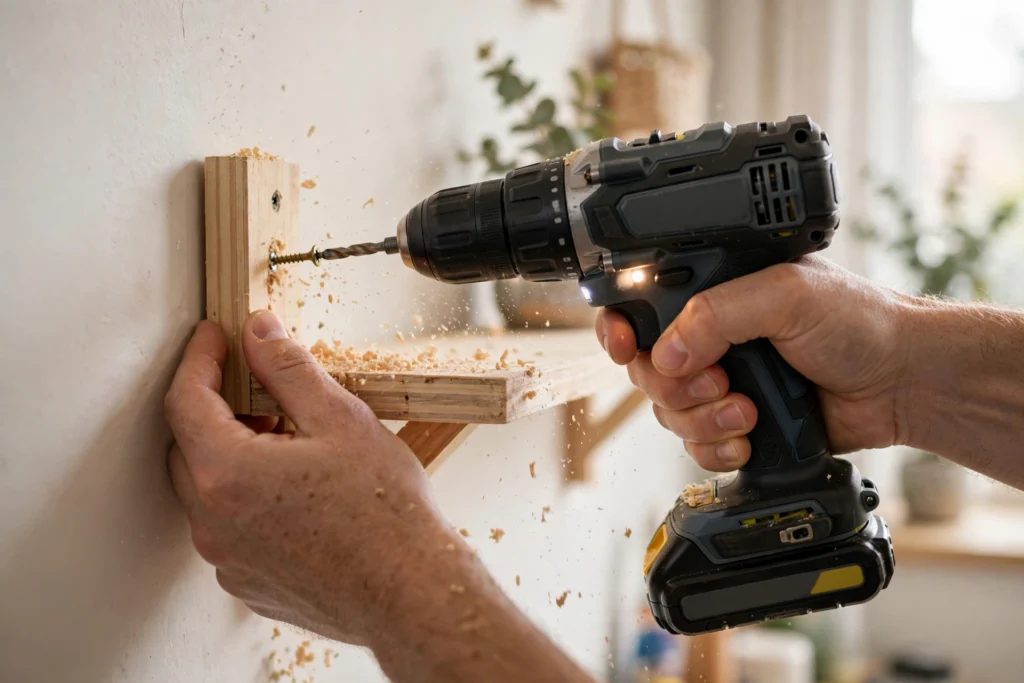
What to buy:
- Voltage: 12V drills are lighter and handle the vast majority of home tasks; 18V/20V drills have more power for heavy work like drilling into masonry. For a first drill, a compact 12V or a light 18V is plenty — don’t buy contractor-grade power you’ll never use.
- Two batteries. Non-negotiable. One charges while you work with the other. A dead single battery mid-project is how jobs stall for a day.
- Keyless chuck, variable speed, and adjustable clutch. The clutch is the beginner’s best friend — it stops the drill from over-driving and stripping screws. Start on a low clutch setting and work up.
- A basic bit set to go with it: twist drill bits for wood and metal, plus driver bits (Phillips, flathead, and a few square/Torx bits). You don’t need 100 pieces — 20 to 30 quality bits beat a giant dull set.
Drill safety basics: keep loose clothing, jewelry, and long hair away from the chuck; let the bit do the work instead of forcing it; and always check what’s behind the surface before you drill (wires and pipes hide in walls — a stud finder helps, but caution helps more).
💲 $60–120 for the drill kit · $15–25 for a bit set · 🛠 Beginner
What to Skip (For Now)
Honesty matters more than a long shopping list. These are fine tools — you just almost certainly don’t need them yet:
- Circular saw. Genuinely useful, genuinely dangerous for beginners — it’s the tool behind a large share of serious DIY injuries. The rare homeowner job that needs one (cutting plywood sheets, trimming a door) can be handled by a rental or a pro. Revisit in a year or two.
- Nail gun. Fast and satisfying, but your hammer handles homeowner-scale nailing just fine, and nail guns demand real respect for safety.
- Angle grinder, reciprocating saw, router. Specialty tools for specialty jobs. Buy one when a specific project demands it — not before.
- Oscillating multi-tool. Actually a wonderful second power tool (cuts, sands, scrapes in tight spots), but it’s a luxury purchase, not a starter one. Put it on the birthday list.
Safety Gear: Non-Negotiable
Tools can hurt you; safety gear is cheap insurance. Budget for these alongside the tools — not after your first scare.
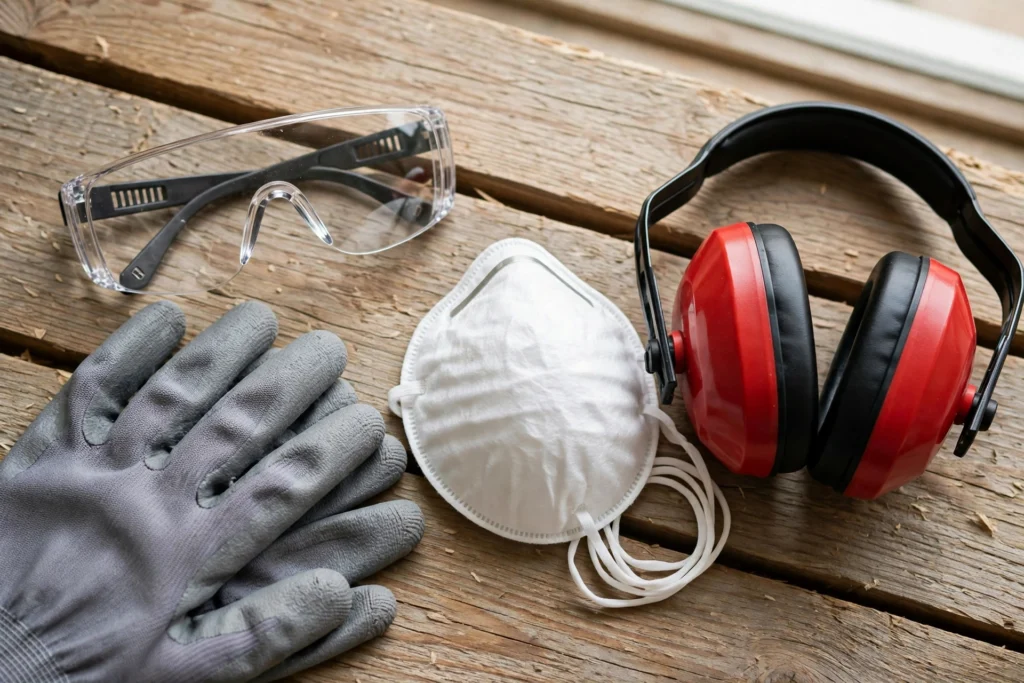
Safety glasses ($5–10). Wear them for drilling, cutting, prying, hammering, anything overhead, and any work under a sink where debris falls toward your face. Get a comfortable pair you’ll actually wear — the best safety glasses are the ones that don’t sit in the package. Your eyes don’t heal like drywall does.
Work gloves ($10–20). For demolition, yard work, handling rough lumber, and sharp metal edges. One important exception: take gloves off around spinning tools like drills — a glove caught in a rotating chuck pulls your hand in with it. Gloves for carrying and prying; bare hands (and tied-back hair) for drilling.
Ear protection ($5–15). Foam plugs or earmuffs. Power tools are louder than most people expect, and hearing damage is cumulative and permanent — it doesn’t heal, and you don’t notice it until it’s done. Even a drill used for an afternoon of projects warrants plugs.
Dust mask or respirator ($5–20). Basic disposable masks for dusty jobs like sweeping the garage or changing a filthy filter; a half-face respirator with replaceable filters for sanding, painting, insulation, or attic work. Two things worth knowing: fine dust (drywall, sawdust) irritates lungs more than most beginners expect, and in homes built before 1978, old paint may contain lead — test before sanding or scraping it, and don’t disturb it until you know.
Your Starter Kit Under $200
Here’s an honest budget breakdown — the hand tools and safety gear that cover your first year of homeownership, for less than one plumber visit:
| Tool | Budget range |
|---|---|
| Claw hammer (16 oz) | $15–30 |
| Tape measure (16 ft) | $10–20 |
| Screwdriver set | $15–25 |
| Adjustable wrench (10-inch) | $15–25 |
| Level (2-foot) | $10–20 |
| Utility knife + spare blades | $8–15 |
| Slip-joint pliers | $12–20 |
| Hex key set | $8–15 |
| Putty knife | $8–12 |
| Stud finder | $20–40 |
| Safety glasses | $5–10 |
| Work gloves | $10–20 |
| Ear protection | $5–15 |
| Dust masks (pack) | $5–15 |
To land reliably under $200: buy the budget-friendly end of each range (perfectly fine for these tools), skip the stud finder for now if money is tight (borrow one — you’ll use it a few times a year), and add tools in this priority order: hammer, tape measure, screwdrivers, utility knife, wrench, then the rest.
The one upgrade worth stretching for: the cordless drill/driver ($60–120). If your budget can stretch to roughly $250–300 total, buy the drill with the starter kit — it’s the single purchase that most expands what you can do yourself. If not, buy the hand tools now and make the drill your next purchase. Either way, it’s the first power tool to own.
What NOT to Buy Yet
A short list that will save you real money:
- The 200-piece mega kit. Covered above — filler pieces and mediocre core tools. Buy individually.
- Specialty saws of any kind (circular, miter, table, jigsaw). Rent per project until you’ve done enough cutting to justify owning one.
- Single-purpose gadgets. If a tool does one weirdly specific thing, you don’t need it yet. Versatile tools first, always.
- Duplicates “just in case.” One good hammer. One tape measure (okay, two — everyone loses one). Don’t stockpile.
- Anything for a project you haven’t started. The bathroom remodel fund is not a tool-shopping fund. Buy the tool when the project is real.
- The cheapest drill bits and blades. Consumables are where cheap truly costs you — dull bits burn wood, wander off-mark, and make every job harder. Mid-range bits, replaced when worn, beat a giant cheap set every time.
Tool Care and Storage: Make Them Last
Good tools last decades; neglected tools last a season. The maintenance is almost embarrassingly simple:
- Clean after use. Wipe down anything that touched moisture, paint, drywall compound, or yard dirt. Five seconds now prevents rust later.
- Store dry. Moisture is the enemy — a dry closet shelf, a toolbox, or a pegboard beats a damp garage floor. If your garage is humid, toss a few silica gel packs in the toolbox.
- Give every tool a home. A basic toolbox ($20–30) or even a 5-gallon bucket with a tool organizer works. Tools that live “somewhere” get rebought; tools with a home get found.
- Batteries: store drill batteries at room temperature, not in a freezing garage or a hot car. Don’t leave them on the charger for weeks — charge before a project, not after.
- Blades and bits: swap utility knife blades the moment they drag (blades are cheap; stitches aren’t). Replace drill bits when they stop cutting cleanly instead of forcing them.
- A drop of oil on plier joints and adjustable-wrench threads once or twice a year keeps everything moving smoothly. Any light machine oil works.
Essential DIY Tools FAQ
What is the single most useful tool for a new homeowner?
A cordless drill/driver, without contest. It drills holes and drives screws — the two operations behind most home projects, from hanging curtains to assembling furniture to mounting shelves. If your budget allows exactly one power tool, that’s the one.
Should I buy a big tool kit or buy tools individually?
Buy individually. Big kits inflate their piece counts with bits and accessories you’ll never use, while the core tools are often lower quality than their standalone equivalents. The ten hand tools in this guide, bought one by one at the budget-friendly end of each range, will outperform any mega-kit at the same price.
How much should a new homeowner spend on tools?
About $150–200 covers the core hand tools and safety gear — less than a single plumber or handyman visit. Add $60–120 for a cordless drill/driver when you can. After that, spend per project: buy the tool the real job in front of you requires, not the one you might need someday.
Are cheap tools okay for beginners?
For tools you’ll use a few times a year — putty knives, hex keys, a level — yes, budget options are completely fine. For tools you’ll grab constantly — your drill, your tape measure, your most-used screwdrivers — spend a bit more. That’s the whole “buy once, cry once” rule: match the spending to the usage, and you’ll rarely regret a purchase.
Which tools do I need for basic home maintenance?
Most routine maintenance needs surprisingly little: a screwdriver, an adjustable wrench, a plunger, a flashlight, and a ladder cover the tasks in our new homeowner maintenance guide — filter changes, detector tests, leak checks, and seasonal jobs. If you own the starter kit in this article, you’re already equipped for nearly all of it.
When should I rent a tool instead of buying it?
When you’ll use it fewer than about three times: pressure washers, floor sanders, tile saws, drain augers for a one-time clog. Compare the rental cost (often $50–80 per day) against the purchase price and, just as importantly, against where you’d store it afterward. Renting also lets you try a tool before committing to owning one.
The Bottom Line
Here’s the secret nobody in the tool aisle tells you: tools don’t make you handy — projects do. The hammer doesn’t teach you anything sitting in a drawer. Buy the starter kit, then use it: hang the shelf, patch the wall, fix the running toilet with the steps in our DIY plumbing repairs guide, work through the seasonal tasks in our new homeowner maintenance guide. Each small job teaches you what the next tool should be.
Start with the basics, buy once and cry once on the tools you’ll use daily, rent the rest, and respect the safety gear. In a year, you won’t just own twenty tools — you’ll know exactly why you own each one. That’s when a house starts feeling like your house.