
Water is the most destructive force inside a home — and the one most new homeowners understand the least. The good news: the plumbing problems that scare beginners the most (a toilet that won’t stop running, a sink that won’t drain, a faucet that drips all night) are also the easiest and cheapest to fix yourself.
This guide covers the DIY plumbing repairs that are genuinely beginner-friendly: the common problems, what causes them, and exactly how to fix each one step by step. Every repair includes time, cost, and a clear “stop and call a plumber” line — because knowing where your limits are is the most important plumbing skill of all.
Safety first: This guide covers fixture-level repairs only — toilets, faucets, drains, and disposals. It does NOT cover opening walls, soldering pipes, touching the main water line, or anything involving gas. There’s a “when to call a plumber” section at the end. Read it before you start.
How Your Home’s Plumbing Actually Works (The 2-Minute Version)
Your plumbing has two completely separate systems:
- Supply — pressurized clean water coming IN from the street or a well. This is what fills your toilet tank, feeds your faucets, and powers your shower. Because it’s under pressure, supply-side leaks spray and get worse fast.
- Drain — gravity-fed wastewater going OUT to the sewer or septic tank. Drain problems are slow: gurgles, slow draining, bad smells.
Why this matters: nearly every beginner DIY plumbing repair happens on the fixture level — the toilet, the faucet, the trap under the sink — where you can shut off the water to just that fixture and work safely. You will never touch the supply lines inside a wall in this guide.
Before You Touch Anything: Know Your Shut-Offs
Every repair in this guide starts the same way: turn the water off. Find these now, before you need them:
- Fixture shut-offs: Look under every sink and behind every toilet. You’ll see small valves on the water lines (usually oval or football-shaped handles). Turn one clockwise (righty-tighty) to shut off water to just that fixture. If a valve is stuck or crusted, don’t force it — leave it and note that it needs replacing.
- The main shut-off: Usually in the basement, crawlspace, garage, or near the water heater. This kills water to the entire house. Test it gently once a year — valves that sit untouched for a decade seize exactly when you need them.
If you can’t find or turn any shut-off, stop. A repair without a working shut-off is how small jobs become floods. Call a plumber to get the valves working first.
The Beginner Plumbing Toolkit
You don’t need a plumber’s truck. These eight items cover nearly every repair in this guide:
- Plunger — get a flange plunger (the one with the fold-out rubber flap) for toilets, and a cup plunger for sinks. Total: $10–15.
- Adjustable wrench (10-inch) — $15–25.
- Channel-lock pliers (tongue-and-groove) — $15–20.
- Bucket and old towels — free. Always put a bucket under the trap before you open it.
- Plumber’s tape (Teflon tape) — $3. Wrap threaded connections to prevent drips.
- Drain snake / hair auger (25-foot hand auger) — $25–35. For clogs a plunger can’t reach.
- Plastic drain hair tool (zip tool) — $5. Pulls hair out of shower and bathroom sink drains.
- Flashlight or headlamp — under-sink work is dark work.
Total investment: roughly $75–125, and it pays for itself the first time you skip a $150 service call.
Toilet Problems (The Big Three)
Toilets cause more beginner panic than any other fixture, but they’re beautifully simple machines: a tank, a flapper, a fill valve, and a bowl. Here’s how to fix the three most common problems.
1. The toilet keeps running
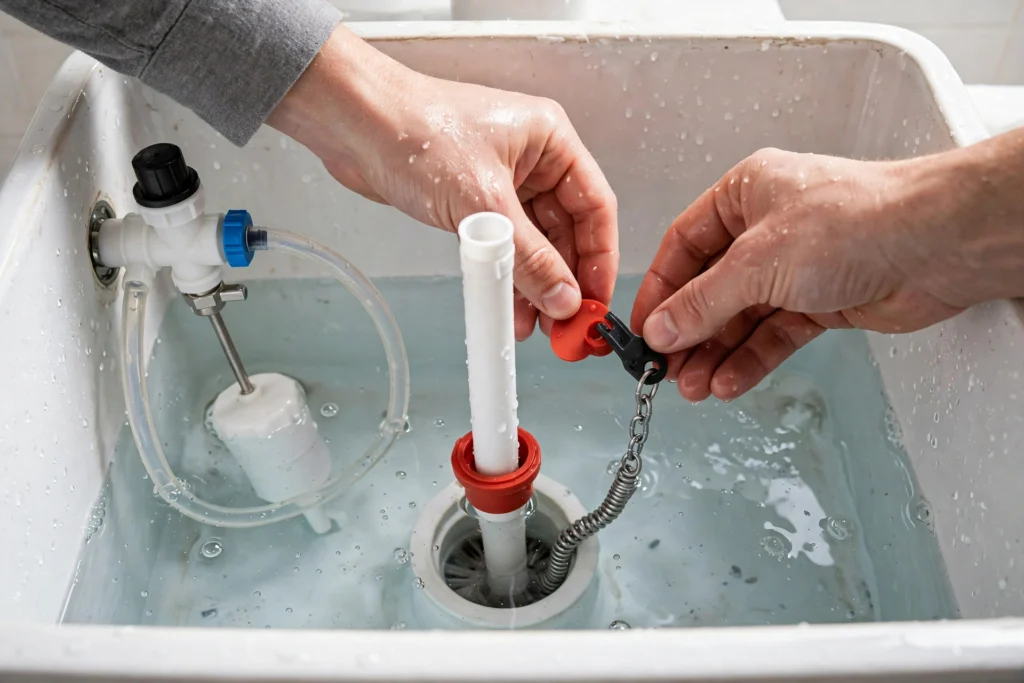
What’s happening: Water flows into the bowl nonstop, usually because the flapper (the rubber seal at the tank bottom) isn’t sealing, or the fill valve isn’t shutting off.
Try this first (5 minutes, $0):
1. Take the tank lid off and set it somewhere safe (they’re heavy and crack easily).
2. Look at the flapper — the rubber disc at the bottom. If the chain is tangled or too tight, it holds the flapper open. Adjust the chain so there’s about half an inch of slack.
3. Check the water level. It should sit about an inch below the top of the overflow tube. If water is flowing INTO the overflow tube, lower the float on the fill valve (there’s usually a clip or screw — push the float down).
4. Flush and watch. If the running stops, you’re done.
If it still runs: the flapper itself is probably worn out (they last 3–5 years). Replacing a flapper takes 15 minutes and costs $5–10: turn off the toilet’s shut-off valve, flush to empty the tank, unhook the old flapper from the overflow tube pegs, snap the new one on, reconnect the chain. Match the size (2-inch is standard; some toilets use 3-inch).
Call a plumber if: water is leaking from the base of the toilet onto the floor (that’s a failed wax ring — a bigger job), or the shut-off valve won’t turn.
2. The toilet flushes weakly
What’s happening: Not enough water reaches the bowl with enough force. The usual causes are simple:
- Low tank water level. Check that the water fills to about an inch below the overflow tube. Adjust the float up if it’s low.
- Clogged rim jets. The small holes under the toilet rim get clogged with mineral deposits over time. Scrub under the rim with a toilet brush, and poke the holes clear with a piece of wire or an old toothbrush.
- Partial clog in the trap. Plunge it — a proper toilet plunging technique is several firm pushes, not frantic splashing. Use a flange plunger, get a good seal, and push-pull 10–15 times.
Call a plumber if: weak flushing persists after these steps, or multiple fixtures drain slowly at once (that suggests a main-line issue, not a toilet issue).
3. The toilet is clogged
- Don’t keep flushing. One flush that doesn’t go down is information; a second flush is a flood.
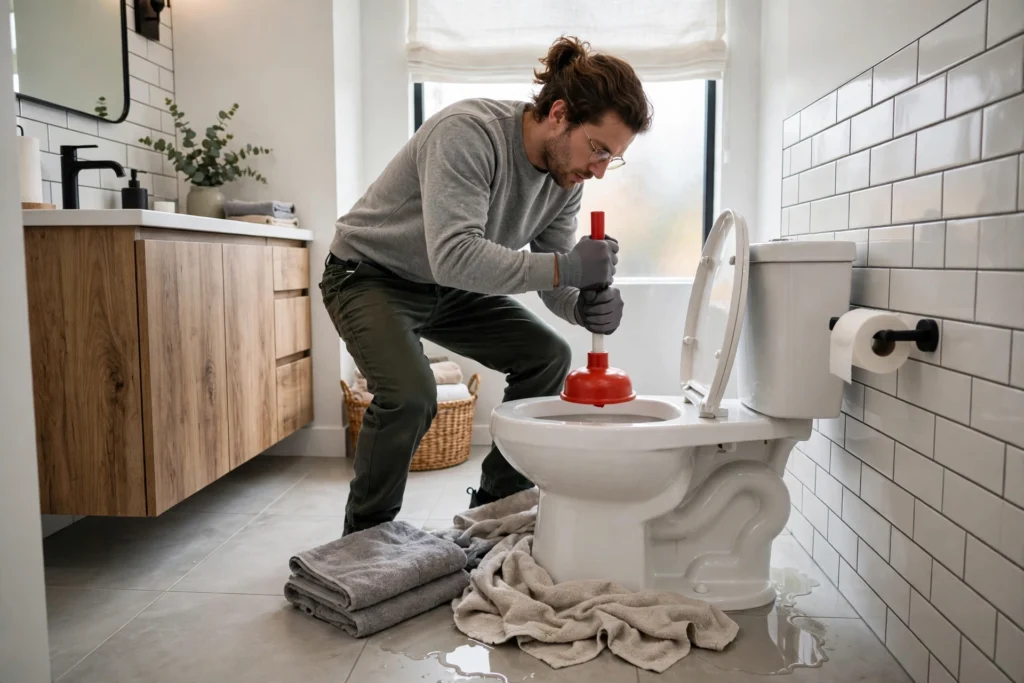
- Put towels around the base. Use a flange plunger with a firm seal over the drain hole.
- Push down firmly, then pull up sharply — repeat 10–15 times. The pulling action is what dislodges most clogs.
- Flush once to test. If the water rises again, plunge again.
- If plunging fails after several rounds, a toilet auger ($30–40) reaches clogs a plunger can’t. Feed it into the bowl drain, crank the handle, and retract slowly.
Call a plumber if: the auger doesn’t clear it, or sewage backs up into the tub or shower when you flush (main-line blockage — stop using water and call immediately).
Fixing a Dripping Faucet
A faucet dripping once per second wastes over 3,000 gallons a year. The fix depends on your faucet type, but the #1 cause across all of them is a worn washer, cartridge, or O-ring — a $5–15 part.
The universal process:
1. Turn off the hot and cold shut-off valves under the sink. Open the faucet to confirm the water’s off and relieve pressure.
2. Plug the drain (small parts love to fall in).
3. Remove the handle — look for a small cap or set screw hiding the screw.
4. Remove the cartridge or stem. Take a photo first so you remember the order of parts.
5. Take the old part to the hardware store. This is the critical step — faucet parts are not universal, and matching by sight beats guessing by model number. Staff at any hardware store will help you match it.
6. Install the new part in reverse order, turn the water back on slowly, and check for leaks.
Call a plumber if: the shut-off valves under the sink are frozen or leaking when you touch them, or the faucet body itself is cracked or corroded.
Unclogging Drains Without Chemicals
Skip the chemical drain cleaners. They’re harsh on pipes (especially older ones), dangerous to handle, and often don’t work on the actual clog — which in bathroom sinks and showers is almost always hair.
Bathroom sink or shower draining slowly
- Remove the stopper or drain cover and pull out whatever hair you can reach by hand (gloves recommended).
- Use a plastic zip drain tool ($5): push it down the drain, twist, and pull up. You’ll be amazed and disgusted. Repeat until it comes up clean.
- Plunge if needed: for sinks, block the overflow hole with a wet rag first (otherwise pressure escapes), then plunge with a cup plunger 10–15 times.
- Hand auger for stubborn clogs: feed a 25-foot drain snake into the drain, crank while pushing gently, and retract. Never force it — if you feel solid resistance that won’t give, stop.
Kitchen sink clog
- First check: is the garbage disposal the issue? Run it briefly — if the sink drains when the disposal runs, the clog was in the disposal.
- Plunge with a cup plunger (plug the other basin if you have a double sink).
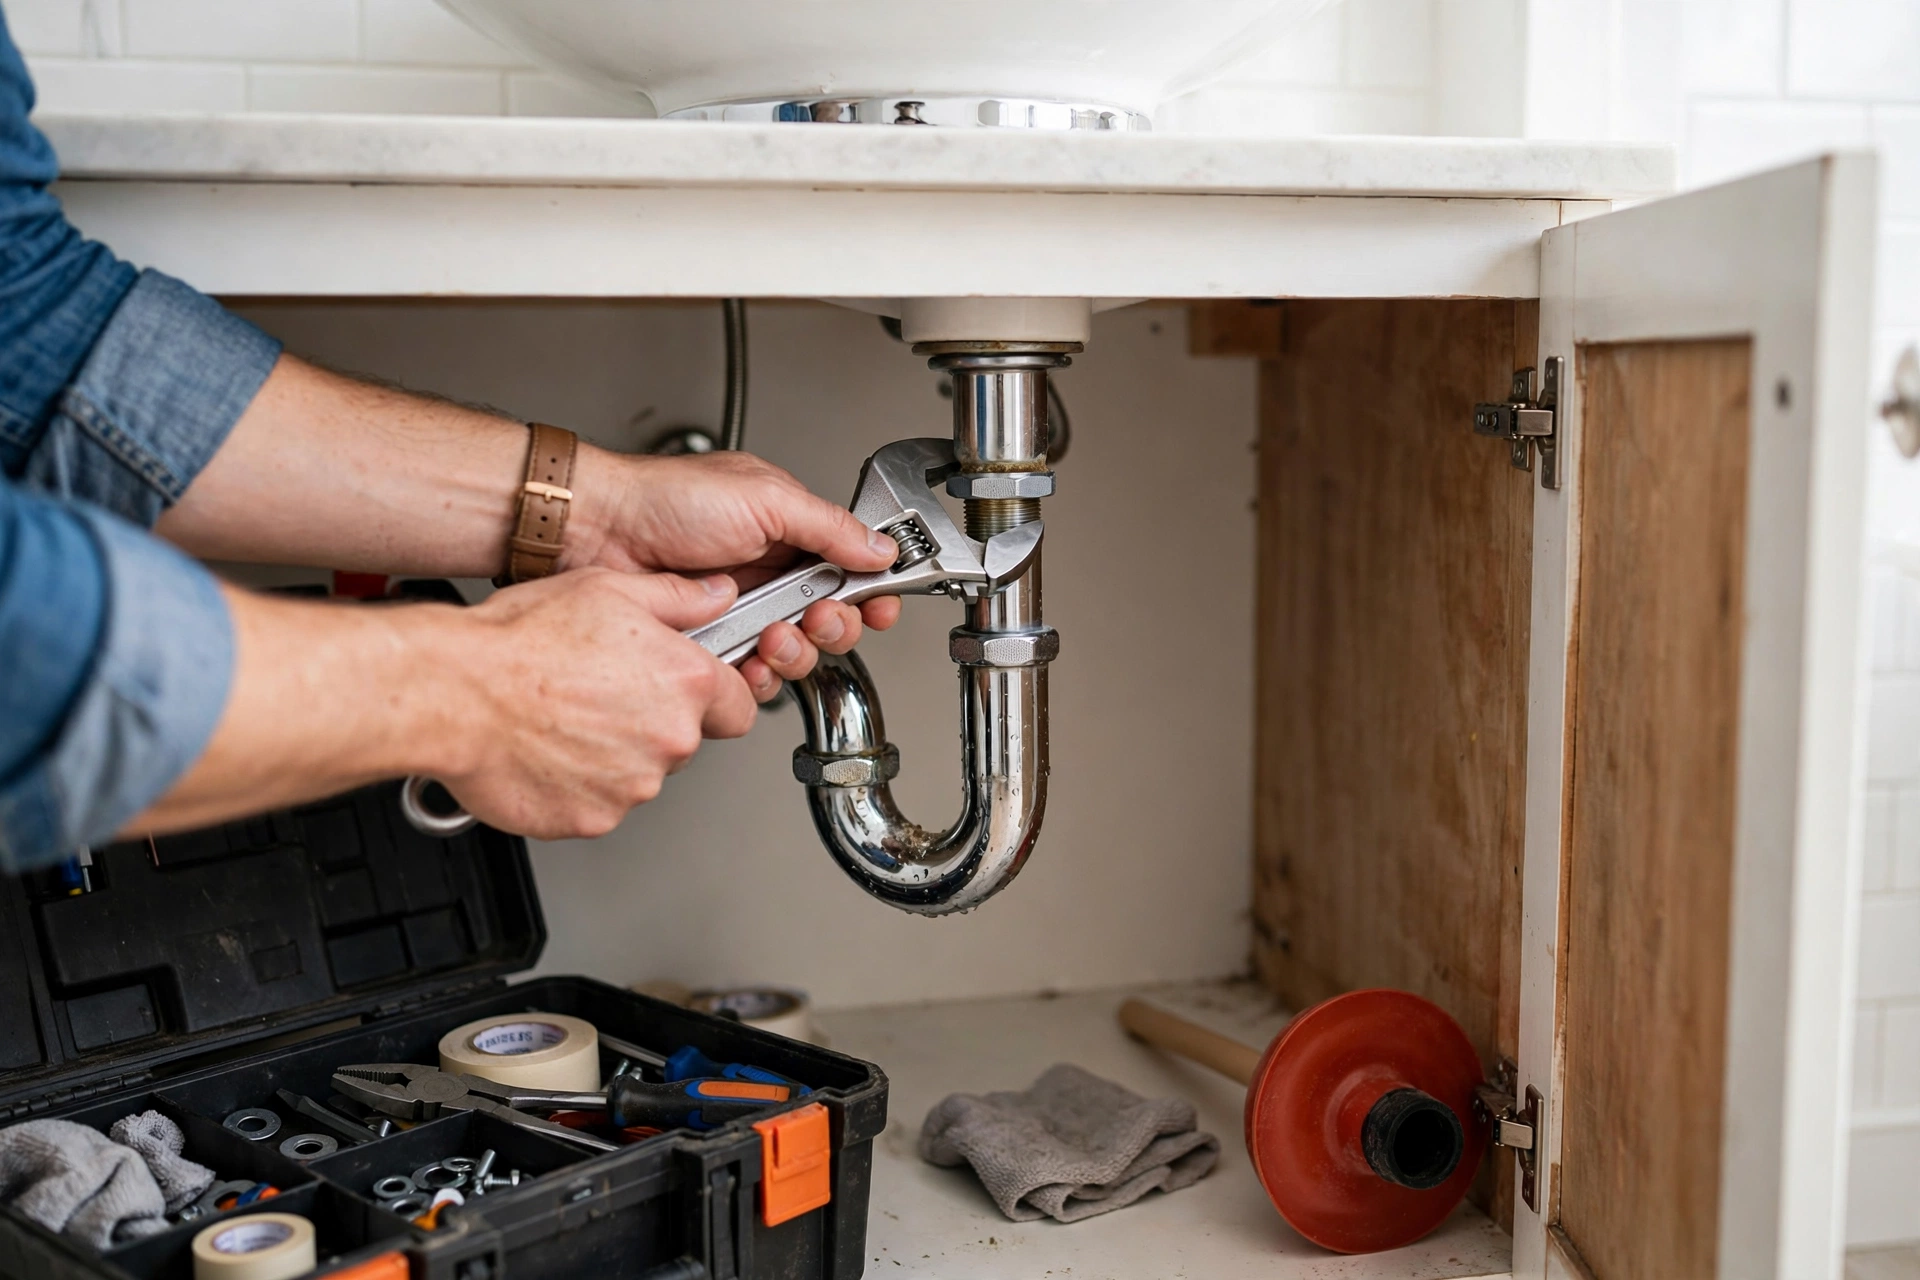
- If that fails, the clog is likely in the P-trap — the U-shaped pipe under the sink. Put a bucket under it, unscrew the slip nuts by hand or with channel-locks, dump it out, clear any gunk, and reassemble. Hand-tighten the nuts, then give them a quarter-turn with pliers. Run water and check for drips.
Call a plumber if: multiple drains are slow or backing up at the same time (main-line clog), you smell sewage, or water backs up into a different fixture.
Garbage Disposal: Reset and Unjam
Disposals seem intimidating but have exactly two beginner fixes, and they solve 90% of problems.
If it makes no sound at all (dead):
1. Check that it’s plugged in under the sink (plugs vibrate loose).
2. Press the reset button — a small red or black button on the bottom of the disposal unit. Press it firmly, then try the switch.
3. Check the breaker if it still won’t start.
If it hums but won’t spin (jammed):
1. Turn the switch OFF.
2. Find the hex socket on the very bottom center of the disposal. Insert the Allen wrench that came with it (usually 1/4-inch) and work it back and forth. This manually frees the jammed flywheel.
3. Reach in from the top? Never put your hand inside a disposal — even with the power off. Use tongs or pliers to pull out the object (a spoon, a bottle cap, a bone) once the flywheel moves freely.
4. Press the reset button, run cold water, and flip the switch.
Call a plumber (or replace the unit) if: the disposal leaks from the bottom housing (the internal seals are shot — replacement is usually cheaper than repair), or it trips the breaker repeatedly.
Low Water Pressure in One Faucet
When only one faucet has weak flow, the problem is almost never the pipes — it’s the fixture:
- Clean the aerator. Unscrew the small screen at the faucet tip (channel-locks with a cloth to protect the finish). Rinse out the sediment and mineral buildup, soak it in vinegar for an hour if it’s crusty, and screw it back on. This fixes the majority of single-faucet pressure problems.
- Check the shut-off valves under the sink — make sure they’re fully open (turn counterclockwise all the way).
- For showers: unscrew the showerhead and clean its filter screen and nozzles the same way.
Call a plumber if: pressure is low throughout the whole house (possible pressure regulator or main-line issue), or hot water pressure alone drops everywhere (possible water heater issue).
Finding and Assessing Leaks
Not every leak needs an emergency call, but every leak needs attention. Here’s how to triage:
- Drip from a faucet or showerhead: annoying and wasteful, but not an emergency. Fix on your schedule using the faucet section above.
- Damp cabinet under a sink: put a bucket under it and investigate. Often it’s a loose slip nut on the trap (hand-tighten + quarter-turn with pliers) or a worn supply line connection. Dry everything thoroughly — mold starts fast in dark cabinets.
- Water stain on a ceiling or wall that’s growing: this is active and hidden — call a plumber. Don’t open the wall yourself; pros have moisture meters and know where pipes run.
- Water at the base of the toilet: failed wax ring or loose tank bolts. Stop using that toilet and call a plumber — the subfloor may already be damaged.
- Any leak you can’t find the source of: call. Mystery water is how $500 problems become $5,000 problems.
When to Call a Plumber — No Exceptions
Part of DIY is knowing the boundary. Call a licensed plumber for:
- Anything inside a wall or ceiling. Opening walls to reach pipes is pro territory.
- The main water line or sewer line. Anything before your main shut-off or beyond your drains’ exit is not DIY.
- Water heater repairs beyond the basic maintenance in our new homeowner maintenance guide (flushing sediment, checking the temperature setting). Gas water heaters especially — never touch gas connections.
- Sewage backups or the smell of sewage from multiple fixtures.
- Frozen pipes that have burst, or pipes you suspect are frozen inside a wall.
- No water at all in the house (after confirming it’s not a municipal outage).
- Any gas smell — leave the house and call the gas company from outside, not a plumber first.
A good rule: if the job requires a permit in your area, it requires a professional. Get two quotes for any job over a couple hundred dollars — reputable plumbers quote free.
DIY Plumbing FAQ
Can a beginner really do plumbing repairs?
Yes — fixture-level repairs. Toilets, faucets, drains, and disposals are designed to be serviced; the parts are standardized and cheap, and every repair in this guide can be done with the water shut off to just that fixture. What beginners should NOT do: open walls, touch supply lines inside walls, work on gas lines, or repair water heaters beyond basic maintenance.
What’s the first plumbing skill I should learn?
Finding and testing your shut-off valves. Every other skill depends on being able to stop the water. After that, learn to replace a toilet flapper — it’s a 15-minute, $5 job that fixes the most common toilet problem.
How do I know if a leak is an emergency?
Active spraying or flowing water you can’t stop: emergency — shut off the main and call now. A steady drip you can catch in a bucket: urgent but not an emergency — fix it this week. A stain that’s not growing and everything is dry: investigate soon, but no panic.
Why does my drain clog keep coming back?
Recurring clogs in the same drain usually mean the clog was never fully cleared (a snake punched through it but left buildup on the pipe walls) or there’s a deeper issue like pipe scale or root intrusion in the main line. If the same drain clogs three times in a few months, get a plumber with a camera to look inside the line.
Should I use chemical drain cleaner?
We don’t recommend it. Caustic cleaners can damage older pipes, they’re dangerous if they splash back during plunging, and they rarely dissolve the actual clog (hair and grease laugh at them). A $5 zip tool and a plunger outperform every bottle on the shelf.
How much money does DIY plumbing actually save?
A typical plumber service call runs $150–300+ for the visit alone, before parts. The repairs in this guide cost $0–40 in parts and 15–60 minutes of your time. One avoided service call pays for the entire beginner toolkit.
The Bottom Line
Plumbing rewards the calm and punishes the rushed. Turn off the water, put a bucket underneath, take a photo before you disassemble anything, and take the old part to the store for matching. The repairs in this guide — running toilets, dripping faucets, slow drains, jammed disposals — are the ones plumbers fix most often, which means they’re the ones designed to be fixed simply.
Learn these, respect the “call a pro” boundaries, and you’ll handle 80% of what your home’s plumbing throws at you — and know exactly when to pick up the phone for the other 20%.