
If your toilet runs constantly — or runs for a few seconds every few minutes, all day long — the most common culprit is a worn-out flapper. The flapper is the rubber seal at the bottom of the tank that lifts when you flush and settles back down to hold water in. After a few years, rubber deteriorates, warps, or gets coated in mineral buildup, and water starts leaking past it into the bowl.
Before you buy anything, confirm the diagnosis with the dye test. Then the actual replacement takes about 15 minutes, costs a few dollars, and requires zero tools beyond your hands.
Quick answer: A toilet flapper is the rubber seal in the tank that lifts when you flush. When it wears out, water leaks into the bowl and the toilet runs nonstop. Do the dye test — food coloring in the tank, color in the bowl after 15 minutes means a bad flapper — then replace it. About 15 minutes, a few dollars.
⏱ 15 min (+ 15 min for the dye test) · 💲 $3–10 for a flapper (typical range) · 🛠 Beginner
What you’ll need:
- Replacement flapper in the right size (see Step 2)
- Food coloring or a dye tablet (for the test)
- Old towel
- That’s genuinely it — no tools required
Safety first: This is one of the safest plumbing jobs there is — you’re working with clean tank water and no tools. The one rule: don’t force anything. Tank components are plastic and ceramic; if something resists, stop and reassess rather than snapping it.
Step 1: Confirm It with the Dye Test FIRST
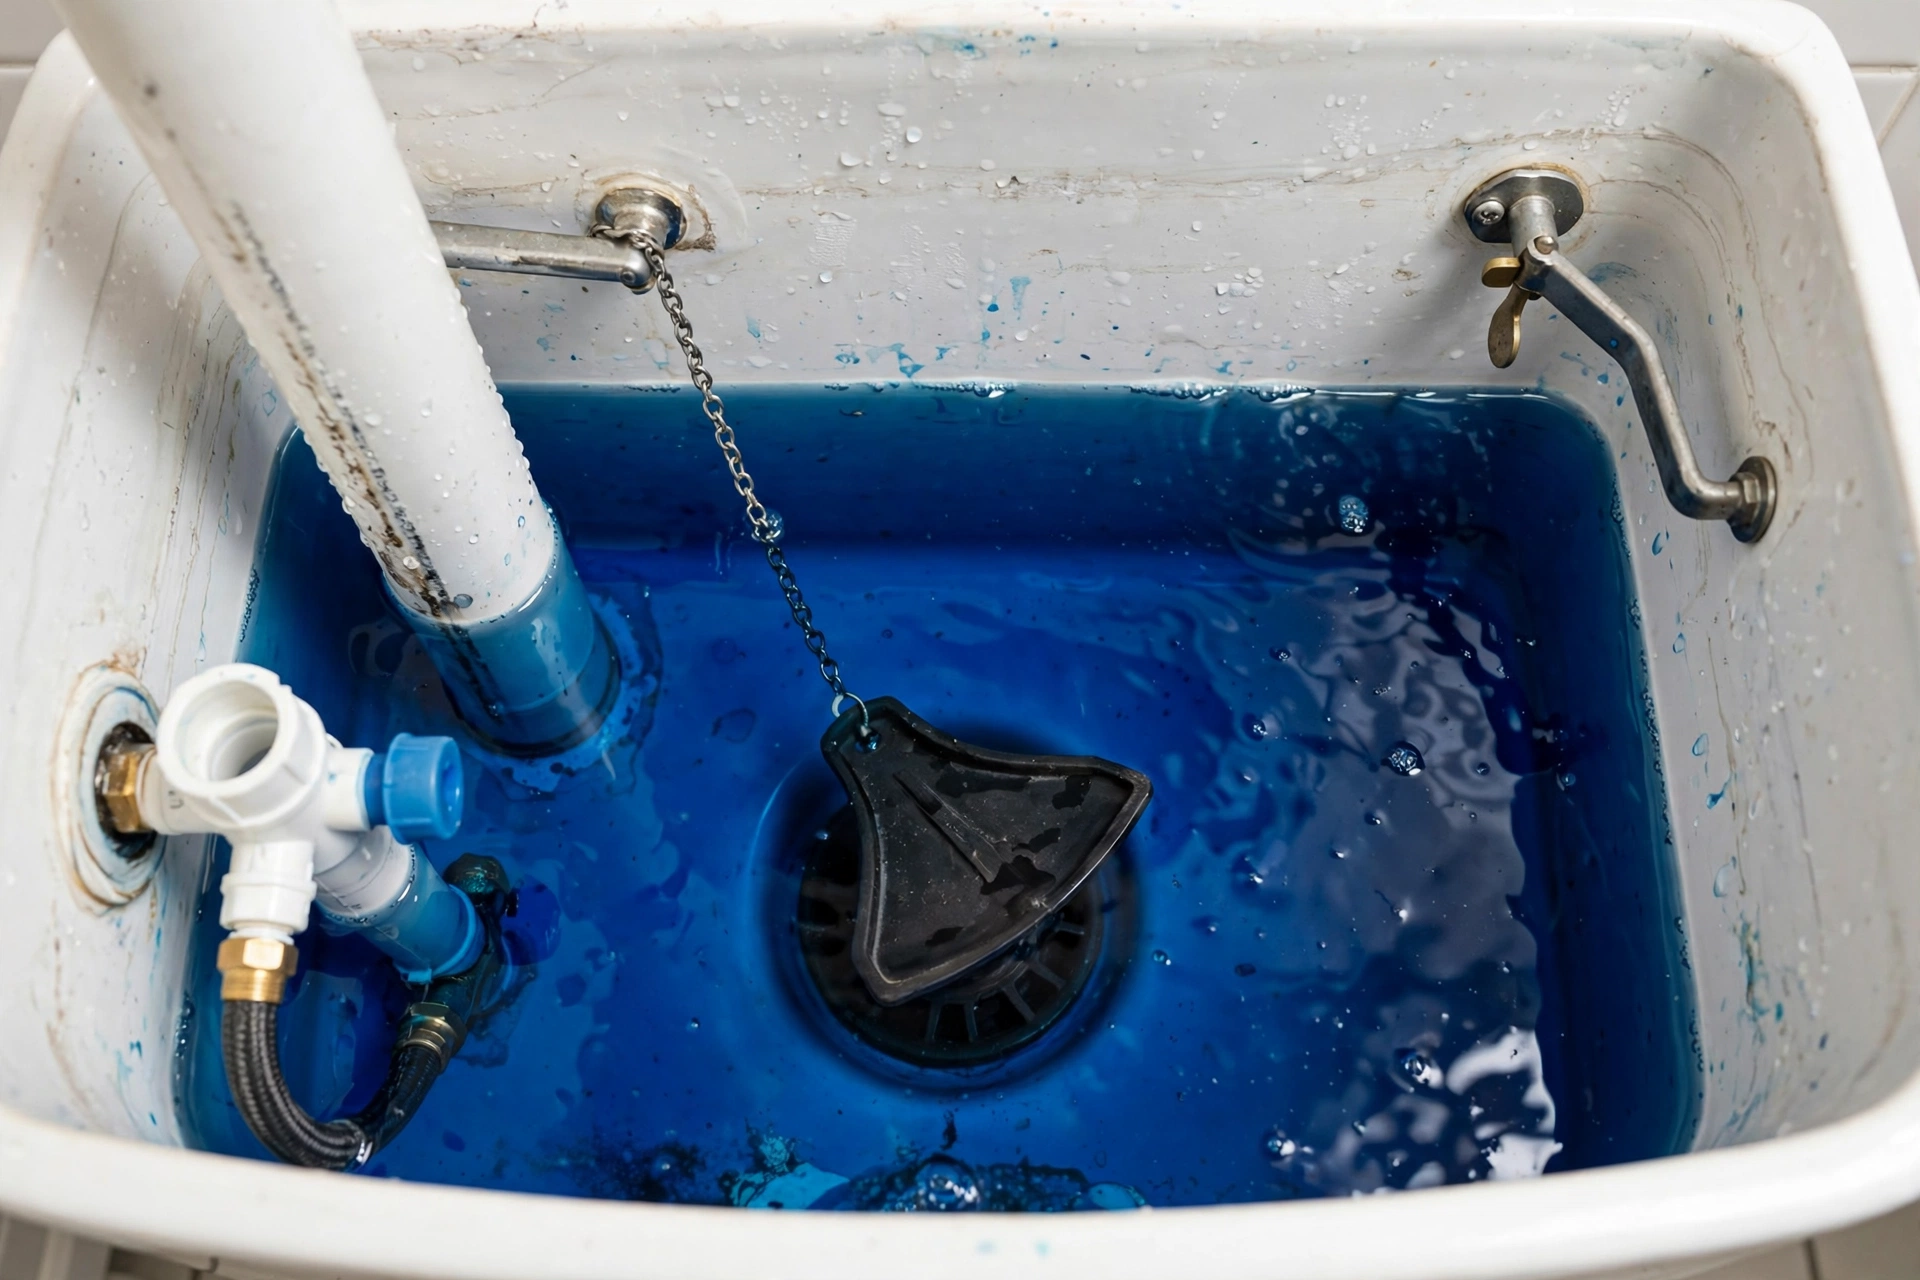
Don’t skip this. A running toilet can also be caused by the fill valve or the water level — replacing the flapper won’t help those. The dye test takes 15 minutes and tells you exactly what’s wrong:
- Remove the tank lid and set it somewhere safe (it’s heavy ceramic — don’t balance it on the tank edge).
- Add several drops of food coloring (or a dye tablet) to the tank water. Dark colors work best.
- Don’t flush. Wait 10–15 minutes.
- Check the bowl. If the bowl water is tinted, water is leaking from the tank into the bowl — your flapper (or the flush valve seat) is the problem. Proceed with this guide.
- If the bowl water is clear but the toilet still runs, the problem is almost certainly the fill valve or the water level — see “Still running after replacing?” below.
Step 2: Get the Right Size Flapper (2″ vs 3″)
Toilet flappers come in two standard sizes, and they are not interchangeable:
- 2-inch flappers — fit most older and many standard toilets
- 3-inch flappers — fit many newer, high-efficiency toilets with larger flush valves
How to tell which you need:
- Measure the old flapper across its widest point, or measure the flush valve opening (the hole the flapper covers) at the bottom of the tank.
- Or just bring the old flapper to the store and match it — the most foolproof method.
- Universal/adjustable flappers exist and work for many toilets, but a size-matched flapper seals more reliably. When in doubt, match the size.
Also note how your flapper attaches: most hook onto two pegs on the sides of the flush valve (the “ears”), and the chain connects to the flush handle lever. Take a photo before you remove anything.
Step 3: Replace the Flapper
- Turn off the water at the shut-off valve behind the toilet (turn clockwise). Flush to drain the tank. Hold the handle down to get as much water out as possible — a little remaining water is fine.
- Unhook the chain from the flush lever. Note which hole or link it was on.
- Slide the old flapper off the mounting pegs on the sides of the flush valve. It usually slides or stretches off — no tools needed.
- Clean the flush valve seat — the rim the flapper seals against. Wipe it with a cloth to remove mineral buildup and slime. Don’t use anything abrasive or sharp; a scratched seat won’t seal.
- Install the new flapper onto the pegs, making sure it sits centered over the opening.
- Reconnect the chain to the flush lever with about 1/2 inch of slack when the flapper is closed. Too tight and the flapper can’t seal; too loose and the chain can tangle under the flapper and hold it open. Adjust by moving to a different chain link.
- Turn the water back on and let the tank fill. Watch the flapper settle onto the seat.
Step 4: Test It
- Let the tank fill completely, then wait and listen. Silence = success.
- Flush once and watch: the flapper should lift cleanly, then settle flat onto the seat as the tank empties.
- Do the dye test once more if you want to be thorough — clear bowl water after 15 minutes confirms the seal.
Still Running After Replacing the Flapper?
If the new flapper is in and the toilet still runs, the flapper wasn’t the (only) problem. Check these in order:
| Symptom | Likely cause | Fix |
|---|---|---|
| Water flows into the overflow tube constantly | Water level too high | Lower the float: adjust the fill valve (screw or clip, depending on type) so water stops about 1 inch below the top of the overflow tube |
| Tank never quite fills, faint hissing | Fill valve not shutting off | The fill valve needs adjusting or replacing |
| Intermittent running every few minutes | Slow leak past the new flapper | Re-check chain slack and the valve seat — the chain may be catching under the flapper |
| Water on the floor around the base | Tank-to-bowl or supply line issue — not the flapper | Tighten supply connections gently; if it persists, call a plumber |
For the full diagnostic walkthrough covering every cause of a running toilet — fill valve problems, water level adjustment, and when parts need replacing — see our complete guide: How to Fix a Toilet That Keeps Running.
FAQ
How do I know if my toilet flapper is bad?
The dye test is the definitive check: food coloring in the tank, and tinted bowl water 15 minutes later (without flushing) means the flapper is leaking. Visible signs include a warped or deteriorated rubber flapper, or a toilet that runs intermittently.
Are toilet flappers universal?
Not quite. The two standard sizes are 2-inch and 3-inch, measured across the flapper or the flush valve opening. Universal adjustable flappers cover many toilets, but matching your size seals more reliably. Bring the old one to the store.
How often should a toilet flapper be replaced?
Typically every 3–5 years, though hard water and in-tank cleaners can shorten that. If your toilet starts running between flushes, the flapper is the first thing to check regardless of age.
Why is my toilet still running after I replaced the flapper?
The most common reasons: the chain has too little slack (holding the flapper open) or too much (tangling under it), the flush valve seat is damaged or dirty, or the real problem was the fill valve or water level all along. Work through the table above.
Can I use a bleach tablet or in-tank cleaner with a new flapper?
In-tank chlorine cleaners are convenient but they accelerate rubber deterioration — many flapper manufacturers advise against them. If you use them, expect to replace the flapper more often.
Do I need to turn off the water to replace a flapper?
Yes — turn off the shut-off valve behind the toilet and flush to drain the tank first. The job is much easier (and cleaner) with an empty tank.
When to Call a Plumber — No Exceptions
- The shut-off valve behind the toilet is frozen or leaks when you touch it.
- The flush valve seat is cracked or deeply pitted — replacing the flush valve itself means removing the tank, which is a bigger job.
- Water is leaking from the base of the toilet or the tank-to-bowl connection — that’s beyond flapper territory.
- You’ve replaced the flapper and adjusted the fill valve and it still runs — a pro can diagnose it in minutes.
For a broader sense of where DIY toilet repair ends, our beginner plumbing repairs guide maps out the boundaries.
The Bottom Line
A running toilet is most often a $3–10 rubber flapper (typical price range) and 15 minutes of your time. Dye-test first to confirm, match the size, mind the chain slack, and enjoy the silence — and the lower water bill.
Pingback: How to Fix a Toilet That Keeps Running: 5-Step Troubleshooting